Homemade Pie Crust
This Homemade Pie Crust is the perfect buttery, flaky crust recipe. It takes minutes to make and is thrown together with a food processor. Whip up your favorite pie filling and bake a gorgeous golden pie with this no fail pie crust.
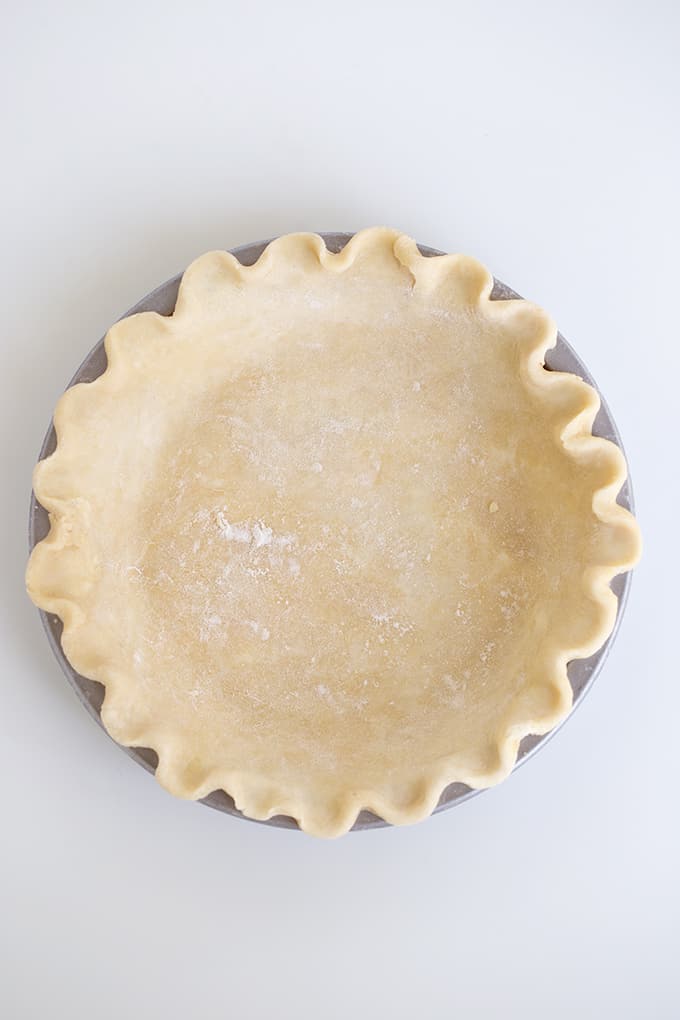
Thinking about making a pie? Wondering if you should buy a premade pie crust? Don’t do it! You can easily make an amazing, buttery, flaky pie crust with ingredients you probably already have on hand!
Our double pie crust recipe is so much better than any store bought crust and its super easy to make. You will be amazed at how delicious your pie can be when you use a homemade pie crust.
How to Make Pie Crust From Scratch
Making homemade pie crust is actually not hard at all. You only need a few simple ingredients and about 10 minutes to complete this recipe. It will need to chill for an hour for the butter to firm up.
Here is a quick look at how to make pie crust from scratch using our recipe:
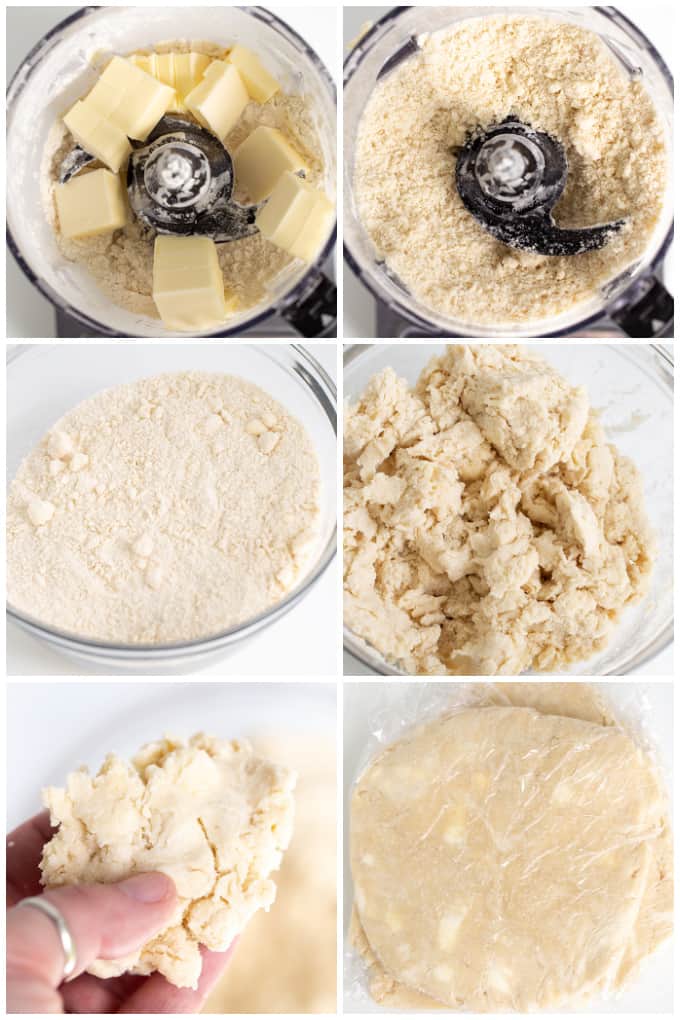
- Mix half the flour with the salt and sugar in a food processor and pulse briefly to combine
- Add the butter and pulse the food processor until the mix resembles coarse sand and develops a yellow color (don’t over mix!) Pea-sized chunks of butter in the mixture is perfect!
- Add the remaining flour and just pulse 10 to 15 times in the food processor to incorporate the additional flour.
- Pour the flour into a bowl and mix in the water. The dough should look clumpy and when squeezed, it holds together.
- Cut the dough ball into two, equal pieces
- Cover with plastic wrap and allow to chill for 1 hour in the fridge.
- Roll one of the pie crust discs out on a floured surface using a rolling pin.
- Fold the crust in half and then place it in your pie pan.
- Unfold the crust and gently work it into a 9 inch pie pan.
- Roll the other ball into a flat circle and set it aside to use later as the top crust for your pie.
Seems easy right? Well, it is! Once you have made this recipe a few times you will become a true pie crust pro. And once you eat a pie made with homemade crust, you will never look back!
How to Make Pie Crust Without a Food Processor
If you are excited to try our double pie crust recipe but you do not have a food processor, don’t worry!
Mix the dry ingredients together in a large bowl then use your hands, a pastry blender, or a fork to work in the butter. Rub the butter into the dry ingredients until it is small, coarse crumbles. Add the water and stir until the dough becomes clumpy and holds its shape.

How to Crimp Pie Crust
If you want your homemade pie crust to look like a professional made it, you need to crimp the edges. This little special touch really makes your pie look beautiful and it is quite easy to do. There are a few ways you can crimp the top of your pie crust and all of them will look great.
- Brush the bottom layer of the pie crust with egg wash before laying the top crust on.
- Trim the dough with a paring knife or scissors, leaving about ½ inch of extra pie crust hanging just past the edge of the pie plate.
- Gently pinch the top and bottom pie crust together to seal the edges.
- Fold the ½ inch of extra pie crust underneath the crust that's in the pie plate leaving a neat, rounded edge.
- Grab some of the dough between your pointer finger and thumb. Use the index finger on the other hand to push the dough gently between your pointer and thumb, making the dough slightly indented. Do this all the way around the top of the pie for a wavy, crimped look. You can do this holding your pointer and thumb above the crust like pictured below or holding your fingers parallel with the pie crust.
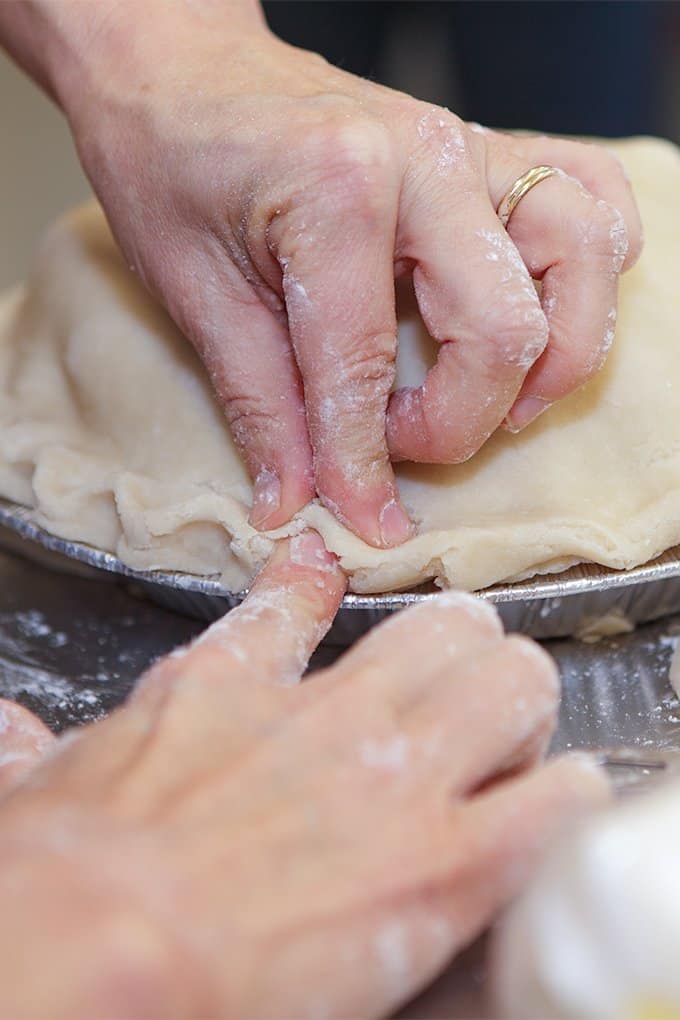
You can get creative in how you crimp your pie crust- make your own signature look!
Can You Freeze a Pie Crust?
You absolutely can freeze pie crust! In fact, it is always a good idea to make some extra dough to have on hand. Once you have made your pie crust, you can freeze it in one of two ways:
- Form the crust out into discs. Place each disc on a piece of parchment paper and gently wrap the crust in the parchment paper. Place the parchment wrapped pie dough in a zippered freezer bag, seal, and store in the freezer for up to 3 months.
- Roll the pie dough out into a 12 inch circle and place it into a 9 inch pie pan. Press the crust into the pan, crimp the edges and then wrap the pan in plastic wrap and freeze.
Both freezing methods work perfectly and will give you a ready to use crust. We like having the crust all ready to go in the pan but, if you don’t have room in your freezer, you can definitely store the crust in a zippered bag as well.
How to Fix a Cracked Pie Crust
If your pie crust cracks before baking, there is a very easy way to fix it. Use your hands to gently push the pie dough back together in the pan, sealing any cracks that may have occurred when you moved the sheet of dough into the pan. The dough should go back together quite easily!
If your pie crust cracks after baking, there are a few ways you can fix it.
- Pinch the dough back together using your fingers. You can also use any scraps you have and pinch that into the cracks.
- If the cracks are fairly small, pour your pie filling right in, and don’t worry about it! When your filling bakes, it will help seal the cracks as it solidifies.
- If the crust has a large crack, mix a little flour and water into a thick paste. Spread the paste across the crust and seal the crack. Place the crust back in the preheated oven for about 10 minutes to set the crust “spackle” then continue to fill and bake your pie.
A cracked crust happens to even the best bakers and isn’t something you should worry too much about.
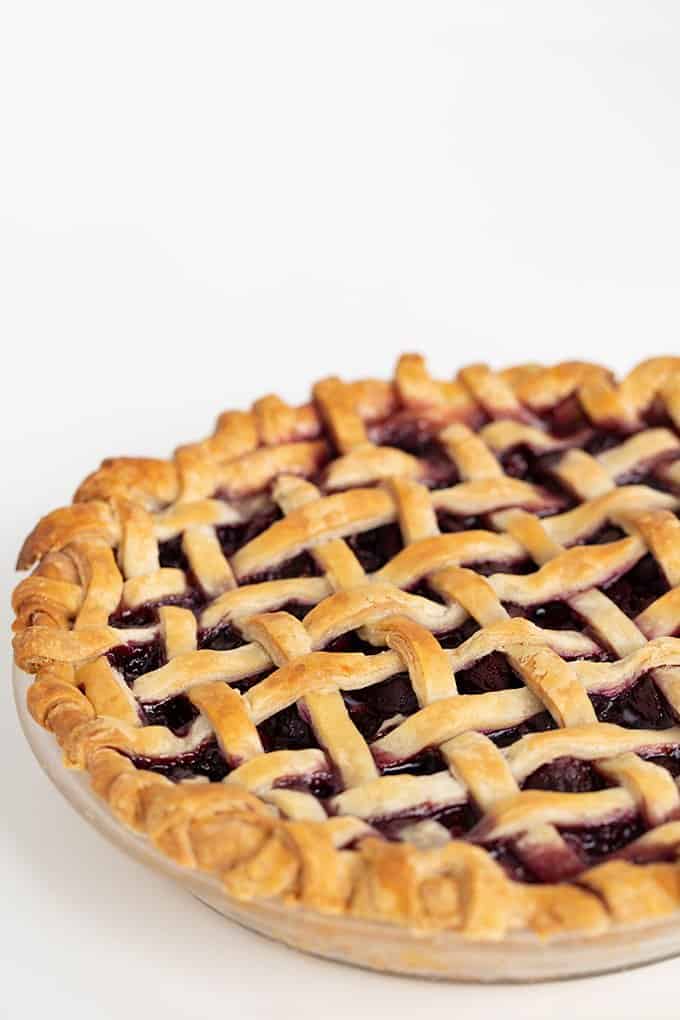
How to Blind Bake a Pie Crust
Many pie recipes ask for a par baked crust. This helps ensure that your crust is fully baked as sometimes, a crust will stay doughy if you try to bake it completely after being filled with wet pie filling. You may even need a fully baked crust if your pie filling doesn’t require baking (like a pudding pie, for example).
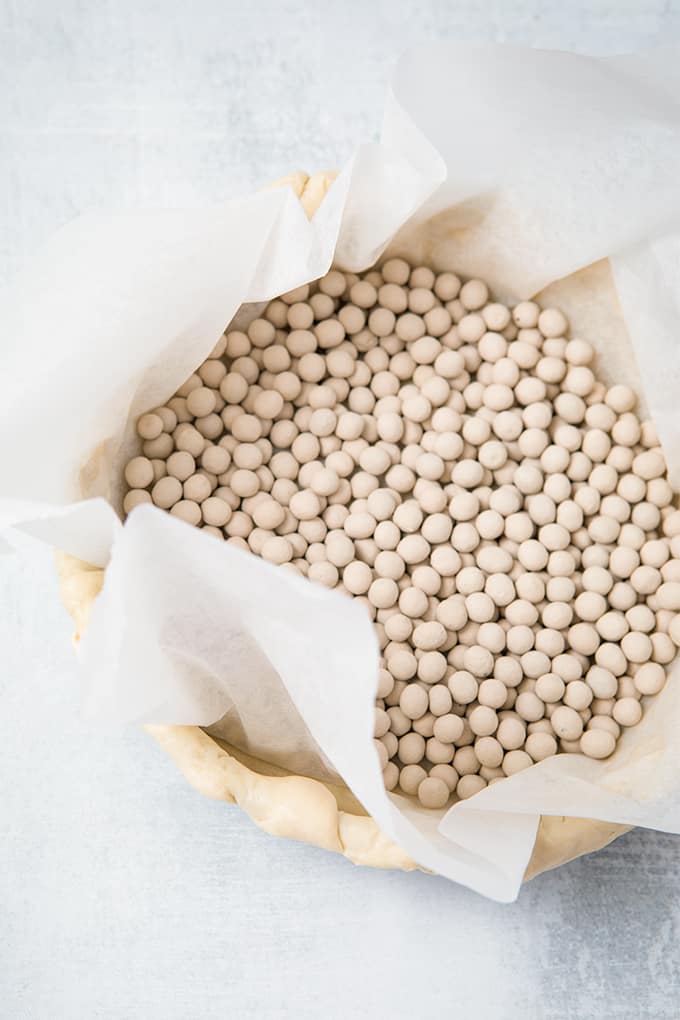
To blind bake a pie crust, follow these simple steps:
- Gently press a piece of foil or parchment paper into your pie crust, fully covering the bottom and sides of the pie.
- Fill the foil/parchment paper with pie weights, dry beans, or even a few teaspoons. Any kind of oven-safe weight will work! Be sure to have the weights going up the side of the crust as well to prevent the crust from falling down the sides of the pie plate.
- Bake the crust in a preheated 425 degree F oven for about 12 to 15 minutes or until the crust is just starting to brown.
- Remove the pie crust from the oven and let cool completely before removing the weights and the foil.
Blind baking a crust is quite easy and this simple extra step will ensure that your pie has a flakey, perfectly textured crust!
While we love the taste of butter in our homemade pie crust, you definitely can opt to use shortening instead. Some people think that shortening makes pie crust flakier but we think the butter works best! Use the same amount of shortening in the recipe as butter. You can also try to use a blend of half shortening and half butter for a flakey, buttery crust.
Our recipe uses all purpose flour to make a perfect pie crust. However you can opt for self rising flour instead. Many people like to use self rising flour in order to make the crust flakier. However, we use the leavening powder of butter in our recipe!
The small crumbles of butter become layered in the dough when you roll it out with the rolling pin. As the crust bakes, moisture evaporates from the butter and pushes the dough up, making it flakey and buttery at the same time! Self rising flour will help the crust to be flaky as well, giving the dough a little more rising power, but it is not needed in this recipe.
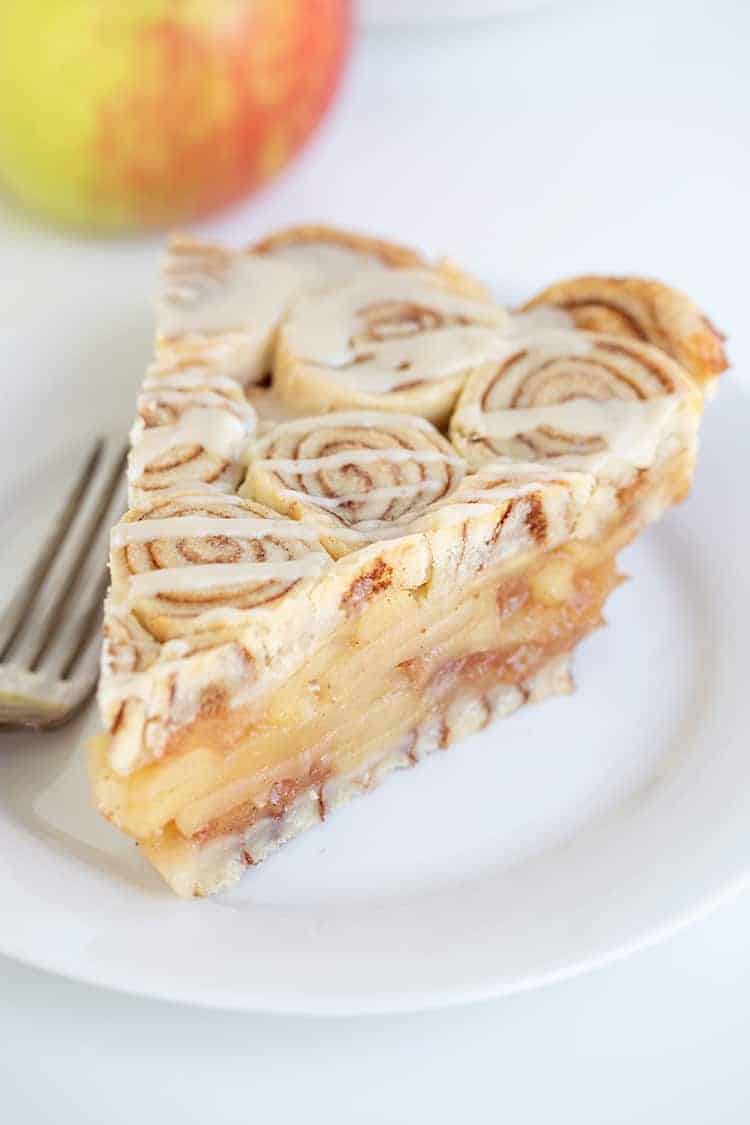
The options are endless! You can make fruit pies, pudding pies, even savory chicken pot pies! If you have extra dough, you can roll up some cinnamon swirl pie crust cookies or bake the extra dough in strips for a sweet, buttery snack. A breakfast quiche sounds delicious and empanadas made with pie crust sound great as well! The neutral taste and buttery texture of homemade pie crust make it perfect for so many applications. Let us know what fun things you create using our double pie crust recipe! We love to hear about your baking adventures!
Tightly wrap the dough with plastic wrap and it will last up to 3 days in the fridge.
Recipe Ideas to put this homemade pie crust recipe to use:
Homemade Pie Crust
Ingredients
- 2 ½ cups all-purpose flour divided
- 1 teaspoon salt
- 1 tablespoon granulated sugar
- 1 cup unsalted butter cold and cubed
- 6 - 8 tablespoons ice cold water
Instructions
- In a food processor, add 1 and ½ cups of flour, salt, and sugar. Using a dough blade, pulse until combined.
- Add in the cubed butter and pulse with a dough blade until the butter is cut into pea sized bits and the flour has a yellow tint to it.
- Add in the rest of the flour and pulse 10-15 times to mix the flour well.The mixture should look crumbly and coarse.
- Dump the flour mixture into a large bowl and add in 6 tablespoons of water. Mix with a spoon thoroughly. Pinch the dough and if it stays together, it's ready! If you pinch the dough and it falls apart, add 1 to 2 more tablespoons of water.
- Knead the dough inside the bowl until the dough comes together and forms a ball.
- Cut the dough into two equal pieces and form them into discs.
- Cover each disc with plastic wrap and place them in the fridge for 1 hour.
- Once the pie crust is chilled, roll one of the discs out onto a lightly floured surface to about ⅛ to ¼ inch thickness. Slowly rock the rolling pin back and forth to start rolling the crust out. If the crust begins to crack, pinch it back together.
- Fold the crust in half and place in a 9 inch pie plate. Unfold the crust and gently work it into the pan.
- Add the filling recipe and if a top crust is needed, repeat rolling out the second disc of pie crust by gently rocking the rolling pin back and forth until it begins to thin out.
- Lightly brush water or egg wash on the bottom pie crust.
- Fold the top pie crust in half and place it in the center of the pie plate and unfold it.
- Press the seams together and cut off the overhang of the pie crust leaving about ½ inch of overhang.
- Tuck the ½ inch of pie crust that hands over the side of the pie plate underneath the bottom crust and crimp the edges with your fingers or a fork.
- Cut slices in the top of the pie crust for vent holes and brush the top of the crust with egg wash.
Notes
(Nutrition facts are an estimate and not guaranteed to be accurate. Please see a registered dietitian for special diet advice.)

