Chocolate Molten Lava Cakes
This post may contain affiliate links. As an Amazon Associate I earn from qualifying purchases. Please read my disclosure policy.
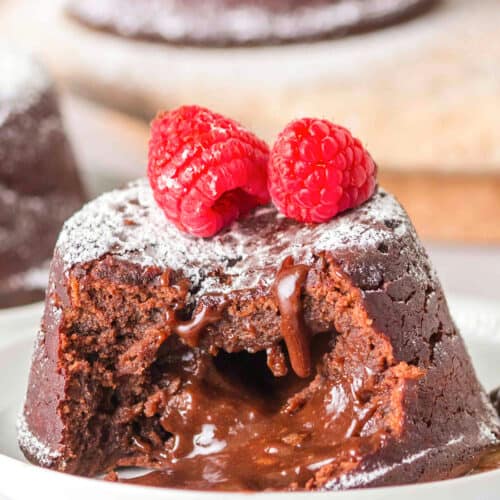
These Chocolate Molten Lava Cakes look fancy, feel indulgent, and only require 7 ingredients you can find in your pantry staples! They’re rich, chocolately, and filled with a molten lava center that flows the moment you cut into them.
The batter comes together easily and can made a day ahead of time! The lava cakes bake up quickly at a high temperature to keep the centers soft and gooey. Whether you’re making these for Valentine’s day, a dinner party, or just because chocolate was calling your name, this is one of those desserts that always impresses.
Why You’ll Love These Lava Cakes
- Gooey chocolate centers every time
- Make ahead dessert
- Simple ingredients that you’ll already have
- Perfect for individual servings
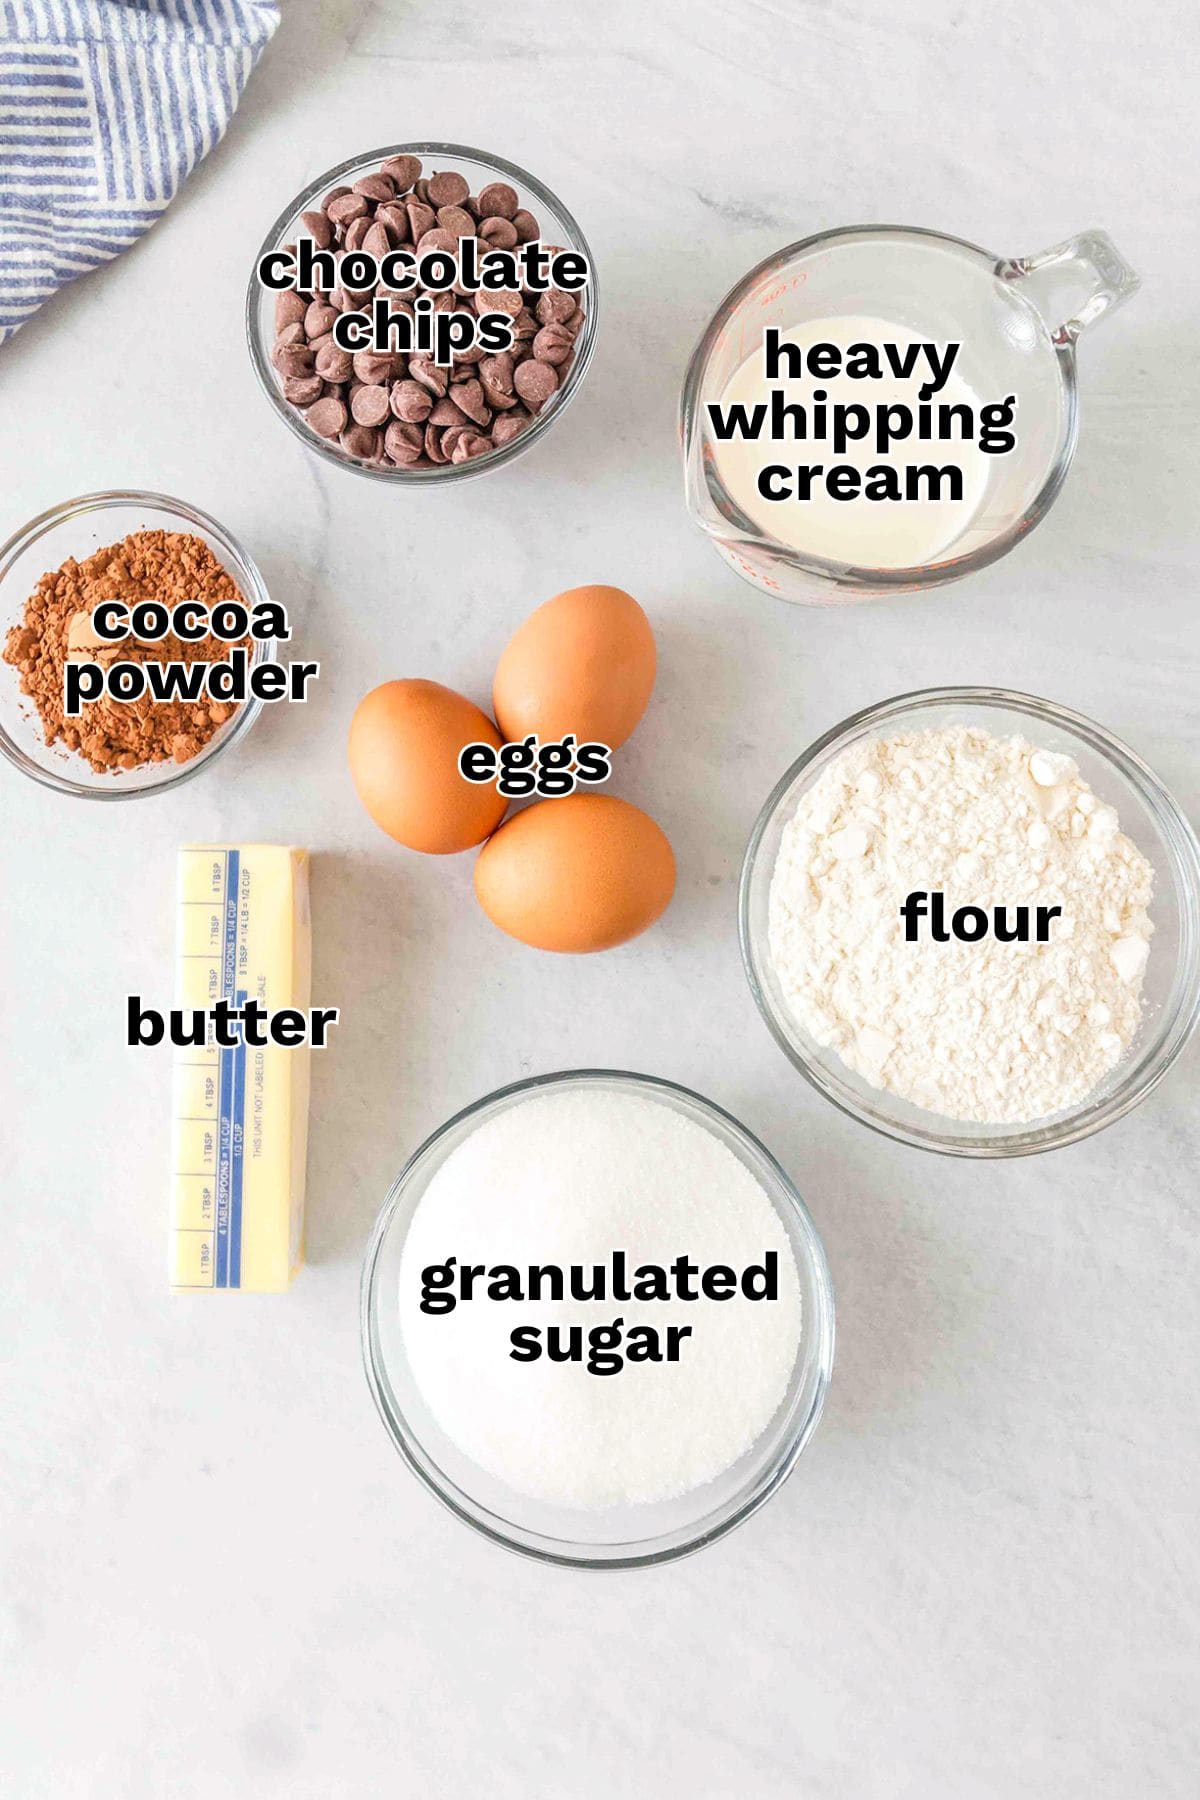
Ingredients You’ll Need
See the recipe card at the bottom of the post for all ingredients and quantities.
Butter – I used salted butter for this molten lava cakes recipe, but you can use unsalted butter. You’ll want to add 1/4 to 1/2 teaspoon of salt if you’re using unsalted butter.
Semi-sweet chocolate chips – This is the perfect balance of chocolate. It’s not too bitter and not too sweet.
Heavy whipping cream – This helps with the melting of the chocolate chips and thining it out once it’s melted. The higher content of the heavy whipping cream is preferred, but I have found that whole milk can be used in a pinch.
Eggs – I used large eggs and size matters. The eggs give the cakes structure and helps keepts the centers gooey.
Cocoa powder – The unsweetened cocoa powder is used to dust the cupcake pan. It helps keep the cakes dark and chocolatey in appearance where all-purpose flour gives it a yellow/white look and is much less appealing.
Substitutions and Variations
- You can substitute the semi-sweet chocolate chips for dark chocolate chips for a less sweet molten lava cake.
- The heavy whipping cream can be replaced with regular heavy cream or in a pinch whole milk
- You can use a 12-cavity standard cupcake pan, a 6-cavity jumbo cupcake pan, or 4 to 6 ounce ramekins for jumbo lava cakes or 3 ounce ramekins for standard cakes.
- Add 1/2 teaspoon espresso powder to boost the chocolate flavor.
- To make these cakes gluten-free, substitute the all-purpose flour for 1:1 gluten-free flour bend.
- To make the lava cakes even more decadent, add a chocolate truffle or soft caramel to the center of the cakes before chilling and baking.
NOTE: This recipe has not been tested with other substitutions or variations
How to Make Chocolate Lava Cakes
Prep Work: Grease the cupcake pans with nonstick cooking spray and coat each cavity with cocoa powder. Tap out any excess cocoa powder.

Step 1: Melt the chocolate chips, butter, and cream together until smooth.
Step 2: In a separate bowl, whisk together the sugar and flour and then whisk in the eggs until combined.
Step 3: Slowly add the egg mixture into the chocolate mixture while constantly whisking until well incorporated.
Step 4: Pour the batter into the prepared cupcake cavities until nearly full. Place the pan in the fridge to chill for at least 1 hour.
Step 5: Bake at 450 degrees F until the edges are set and the centers are soft, dark, and not fully set.
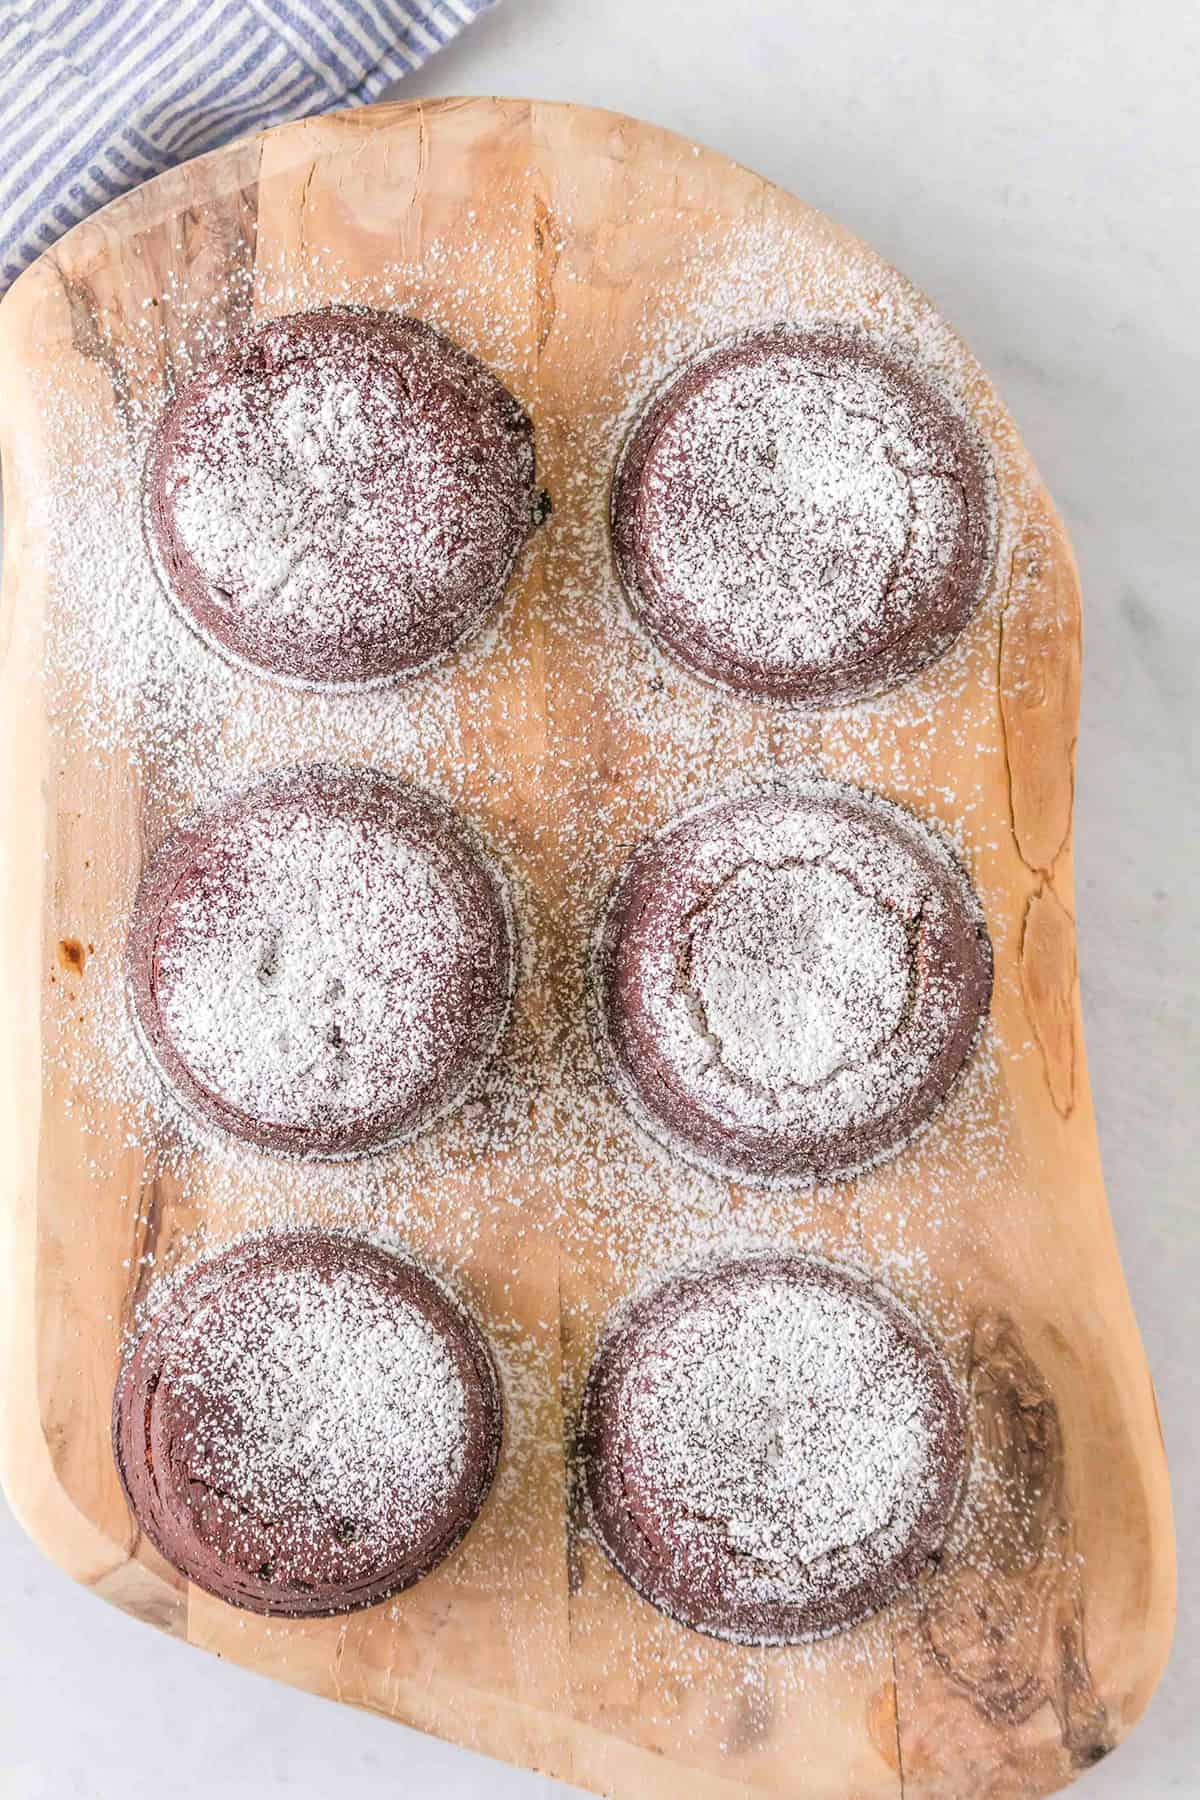
Step 6: Rest 10 minutes before inversting onto a platter and serve warm.
Tips for Best Results
- Don’t skip chilling the batter. This helps create the lava center.
- Use cocoa powder to coat the cupcake cavities and not all-purpose flour. Strictly for looks.
- Watch the bake time closely. Overbaking the cakes means you’ll have no molten lava inside.
- Centers should reach 160 degrees F for food safety.
- Let the cakes rest for 10 minutes before flipping so they release cleanly.
- If the cakes don’t release easily, run a knife around the outside of the cake before flipping.
How to Tell When They’re Done
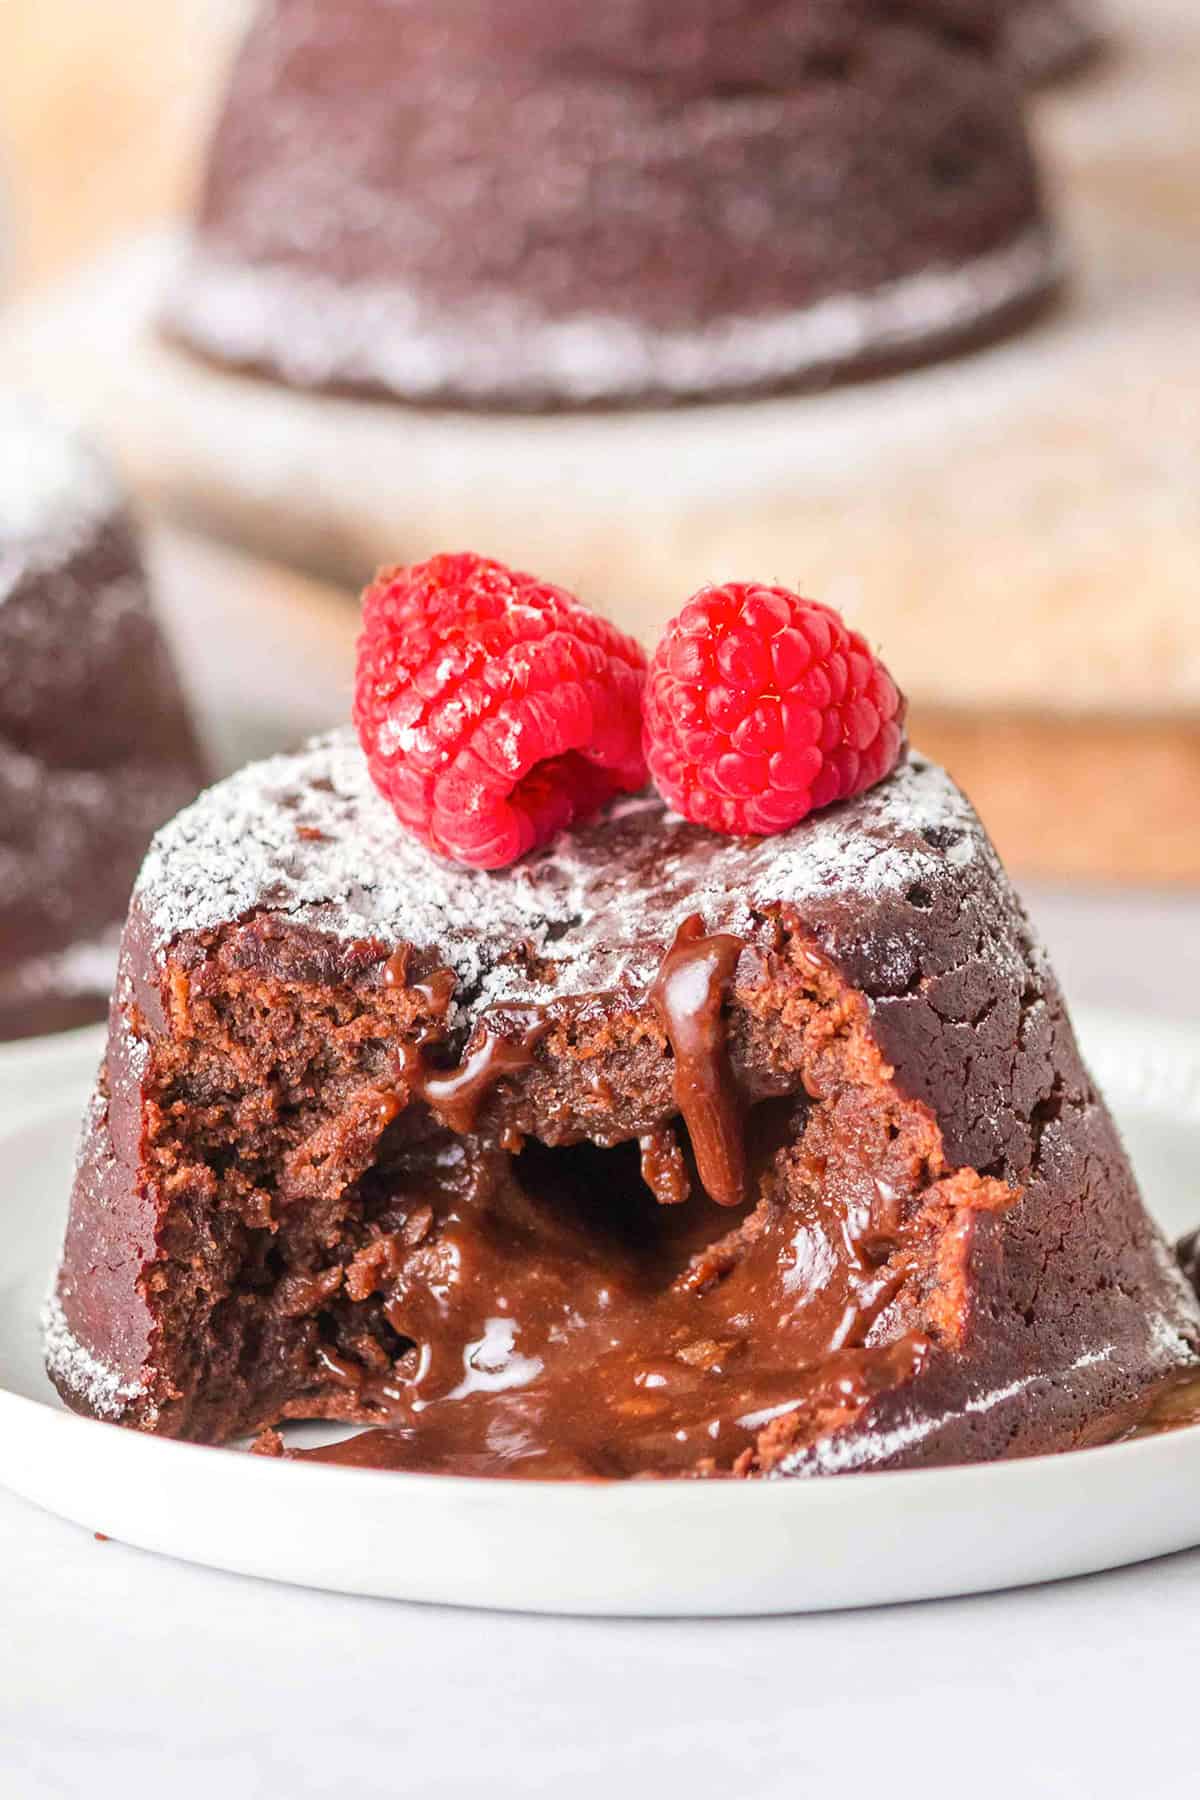
The edges should look set while the centers will appear slightly darker and may sink just a bit. The centers won’t look like raw batter, but they also won’t look fully baked. That’s exactly what you want!
Serving Suggestions
Serve warm with:
- Vanilla ice cream
- Fresh berries
- Whipped Cream
- Powdered Sugar

Recipe FAQs
It’s a French dessert that consists of a chocolate cake exterior with a warm liquid center. It’s named for its molten center that flows out like lava. This can either be done by underbaking the cakes or by adding a ganache center to the cakes. This recipe is underbaked, but I do have a slow cooker chocolate lava cake that uses a ganache center.
Chilling helps control how quickly the outside bakes and helps keep the center gooey.
Yes! You can make the batter and put it in the cupcake pans up to 24 hours before baking.
The cakes were likely overbaked. You’ll need to reduce the bake time by 1 to 2 minutes next time.
This Chocolate Lava Cake was originally posted May 9, 2013 and has been updated with more information, new pictures, and some recipe tweaks.
If you try this recipe, be sure to leave a rating below and also share it on Instagram, and tag me! You can also find me on Facebook and stay up to date on recipe releases by joining the Newsletter!
Chocolate Lava Cake
SAVE THIS RECIPE
Ingredients
- 3/4 cup salted butter
- 12 ounces semi-sweet chocolate chips
- 1/2 cup heavy whipping cream, whole milk has worked for me as well
- 3/4 cup granulated sugar
- 2/3 cup all-purpose flour
- 5 large eggs
- 6 teaspoons cocoa powder, divided and to dust the cupcake pan
Instructions
- Using either a jumbo 6-cavity or regular 12-cavity cupcake pan, spray nonstick cooking spray. In one cavity at a time, pour a teaspoon of cocoa powder in. Tap the powder as you retotate the pan until it covers the entire cup. Repeat to the rest of the cups.
- In a microwave safe bowl, add the 3/4 cup salted butter 12 ounces semi-sweet chocolate chips, and 1/2 cup heavy whipping cream. I used regular milk since I didn't have heavy cream and it worked fine.
- Microwave in 30 second intervals and stir the chocolate each time afterwards. Repeat until the chocolate is melted and smooth.
- In a separate bowl, add the 3/4 cup granulated sugar and 2/3 cup all-purpose flour. Whisk until combined.
- Add the 5 large eggs to the dry mixture and whisk until incorporated.
- Slowly poor the egg mixture into the chocolate mixture and whisk constantly until everything is combined.
- Pour the batter into the cupcake cavities. The batter doesn't rise much, so fill each cavity almost to the top. Place in the fridge to chill for at least 1 hour and up to 24 hours.
- Preheat the oven to 450 degrees F.
- Place pan in the oven for 9 to 11 minutes for a 12-cavity cupcake pan and 15 to 18 minutes for a jumbo 6-cavity cupcake pan until the top centers are barely cooked. They won't still be a batter, but will be darker in the center than on the edges and may sink. This will help keep the gooey chocolate inside until the cake is cut into. For the eggs to be safe to eat, the center of the lava cakes needs to reach 160 degrees F.
- Take the lava cakes out of the oven and let them sit in the pan for 10 minutes.
- Place a platter on top of the cupcake pan and flip the cupcake pan to turn the lava cakes out onto the platter. The cakes should come out perfectly.
- Serve with ice cream or fresh fruit. Whatever your heart desires, actually.
Notes
Nutrition
(Nutrition facts are an estimate and not guaranteed to be accurate. Please see a registered dietitian for special diet advice.)
oh my goodness… just made these & wow AMAZING! thanks so much for sharing.. I’ve always wanted to make lava cakes & this was simple, easy & delish!! 🙂
Thank you! I’m glad you loved them 😀
Lol my partner is always moaning about my smart phone to, he complains that I am on it all the time, seriously pinterest app is the best 🙂 and these look amazing. I love chocolate lava cake, never made one but love ordering it when I’m out and about. Think that is going to change as these are hard to resist.
Partners are a pain in the butt. That is a definite. I cannot help but get sucked into pinterest. I feel as if he benefits from it since I always end up making something after spending all my time on it. This cake is really easy to make and super delicious.