Homemade Butter Mints
This post may contain affiliate links. As an Amazon Associate I earn from qualifying purchases. Please read my disclosure policy.
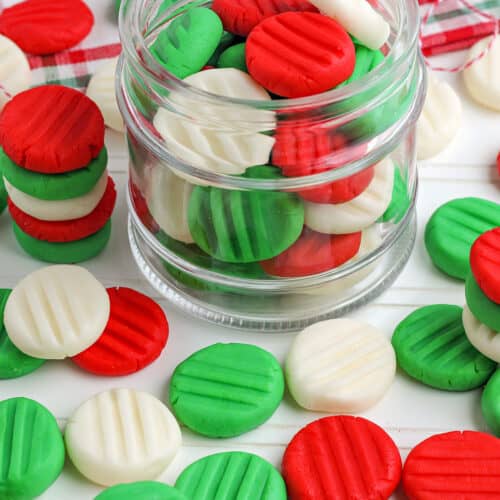
Learn how to make the best butter mints you will ever have. They’re loaded with butter, peppermint extract, powdered sugar, and half and half. This is such a velvety melt-in-your-mouth mint recipe that’s perfect for Christmas, Baby Showers, or to just grab a hand full for an after dinner candy.
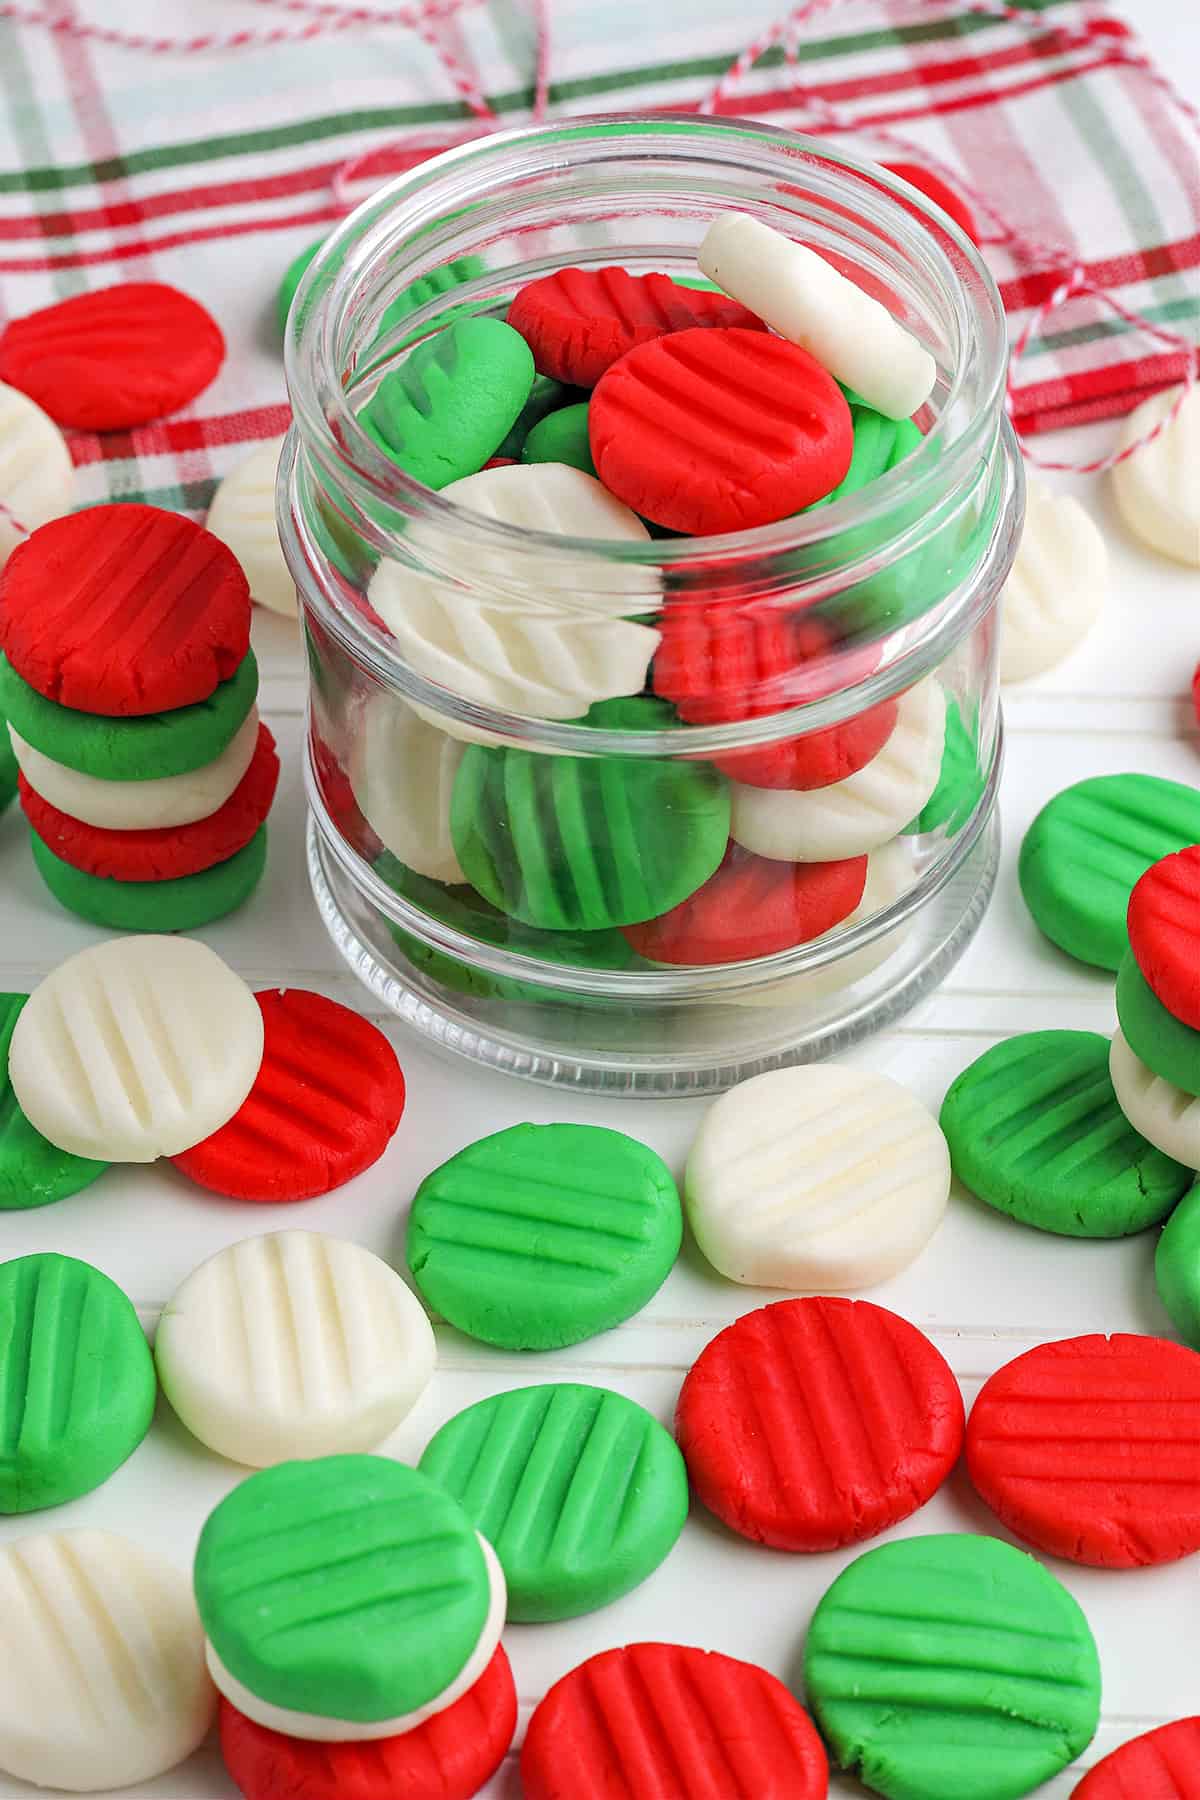
This is an old-fashioned candy recipe that has been around for ages. A tried-and-true treat that young and old will enjoy these sweet butter mints. I also have a fantastic cream cheese mint recipe for my cream cheese lovers.
Consider making some cinnamon candy, Christmas truffles, or even this chocolate-covered pretzel recipe. All are great treats as well!
Ingredients
See the recipe card at the bottom of the post for all ingredients and quantities.
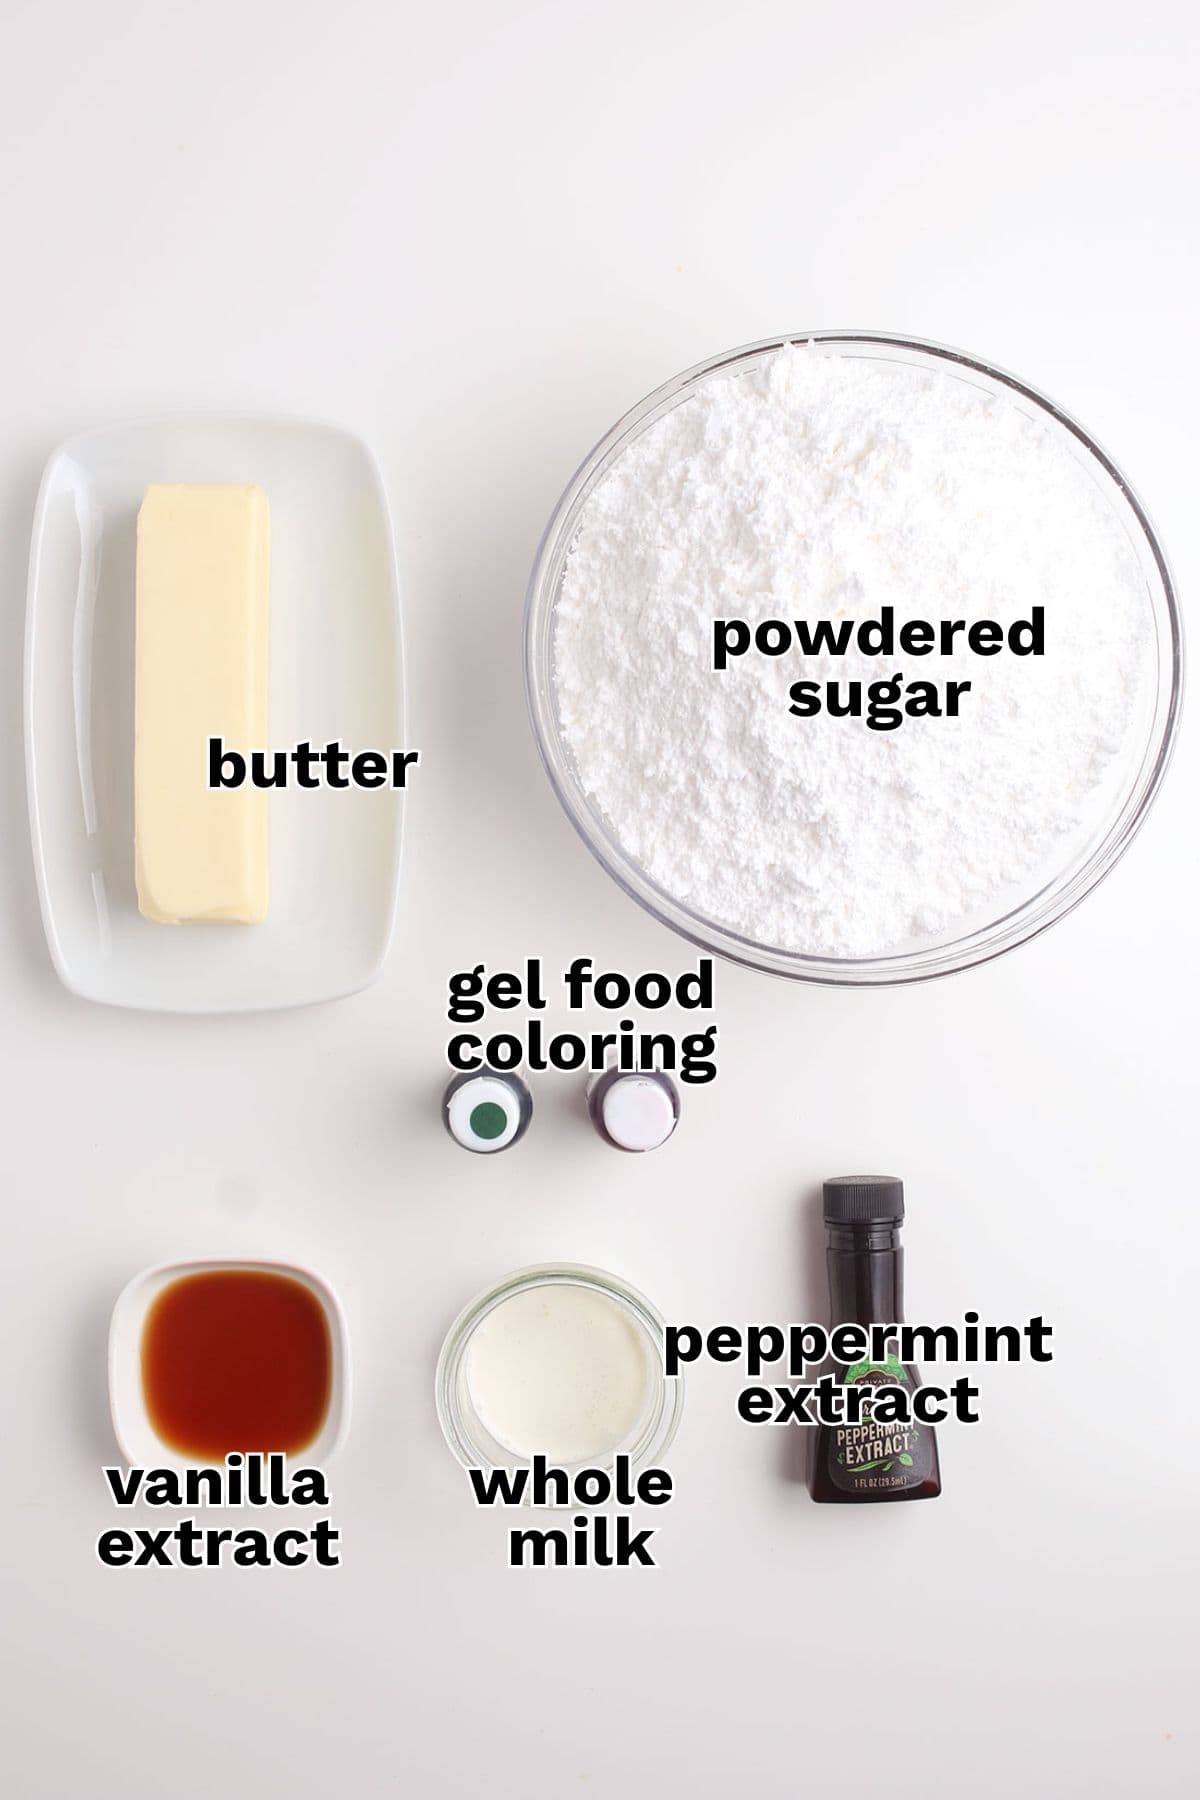
- Butter – Room temperature butter is needed for this recipe. You will also want to ensure it is real butter, not margarine. I prefer to use salted butter for my butter mints recipe.
- Powdered Sugar – Confectioner sugar is another name for powdered sugar. This will create a velvety texture and thicken up the mixture to hold its shape.
- Half and Half – You will use half and half for making the mint ultra creamy or use whole milk.
- Vanilla – Vanilla extract will help to balance out the flavors of the mints.
- Mint Extract – Reach for a peppermint extract to add that smooth and cooling mint flavor.
- Gel Food Coloring – Reach for any colors of food coloring you would like. Or leave the mints the natural color if you prefer.
Substitutions
- Heavy Cream – Use heavy cream instead of half and half for a richer flavor to the mints.
- Sugar-Free Mints – Reach for a sugar-free powdered sugar like Swerve or Tuvia brand to create sugar-free butter mints. Just know the texture will be slightly different.
- Extract – Reach for any flavor of extract you would like. Wintergreen, cinnamon, raspberry, orange extract, or more. Feel free to play around with the flavor.
- Color of Mints – Any color of food coloring will work. I do recommend using gel food coloring for the best result of the colors.
NOTE: This recipe has not been tested with other substitutions or variations
How to Make Butter Mints
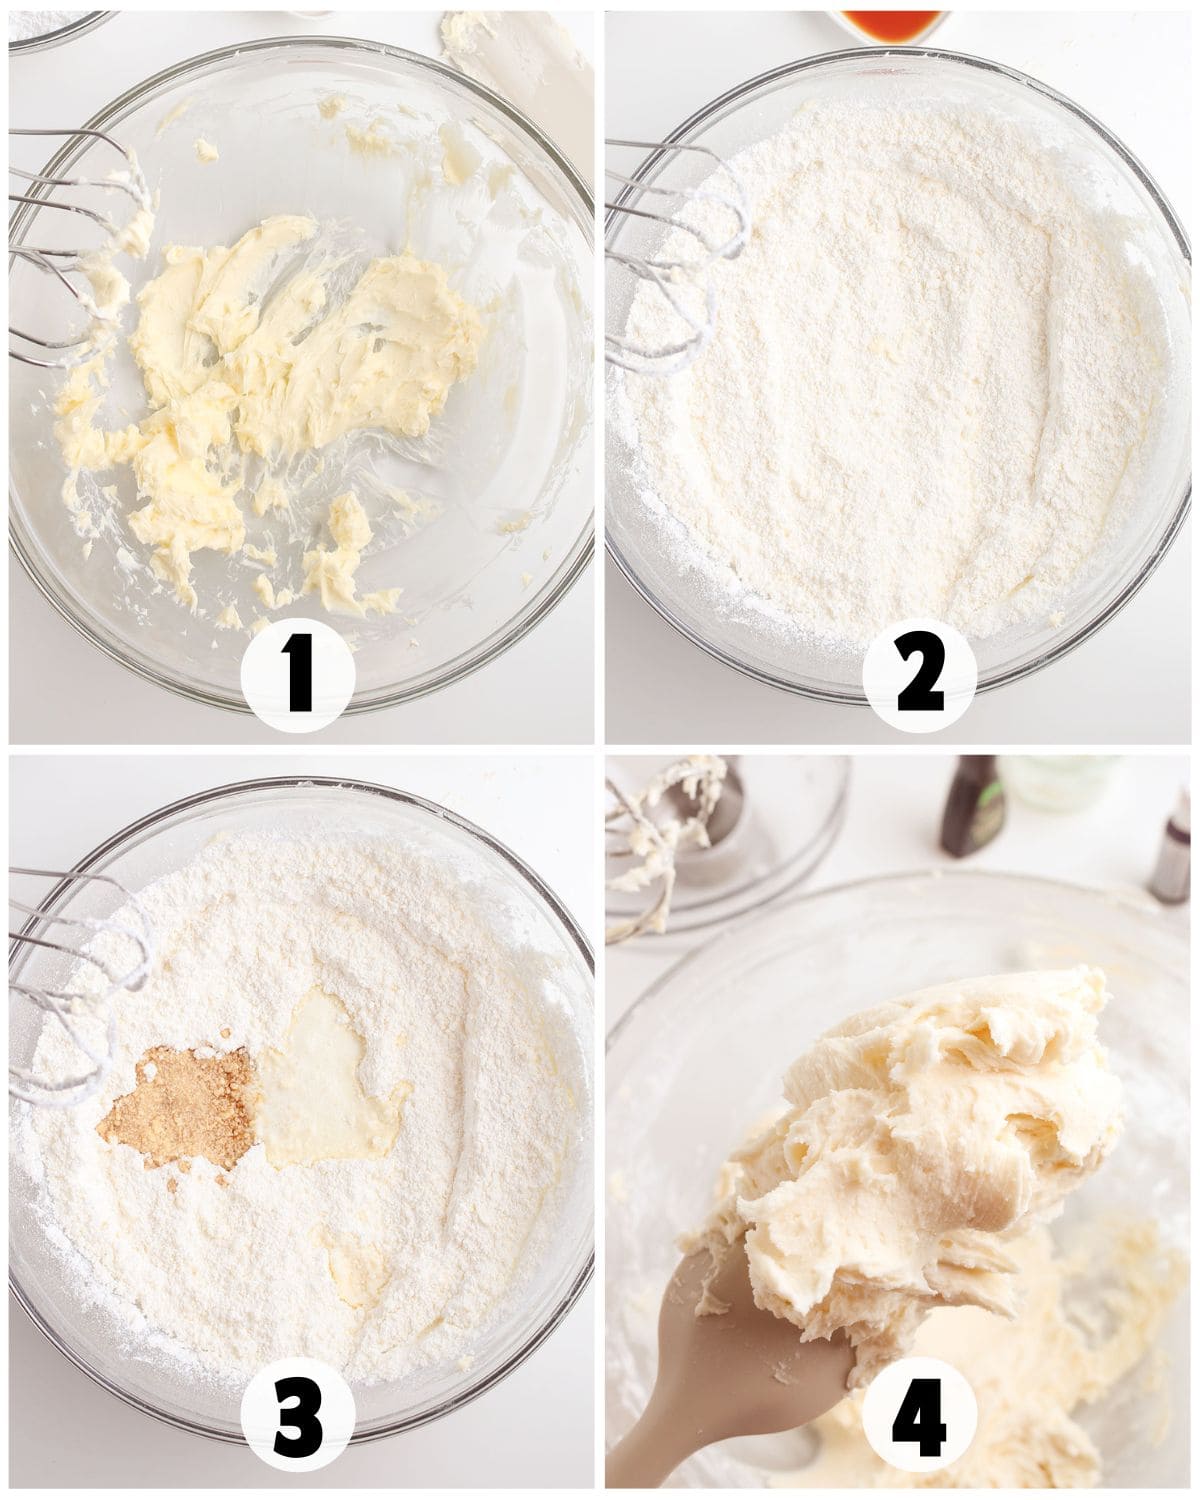
Step 1: Start with a bowl add your butter and cream it for a few minutes until nice and smooth.
Step 2: Next, you will work in the powdered sugar on low speed with a hand mixer. Mix until a dough is created.
Step 3: Slowly add in the milk and the extracts. Work the dough and mix it completely. It will begin to clump a bit.
Step 4: Next, divide the dough into 3 portions. Wrap each of the colored dough in plastic wrap and store in the fridge for 30 minutes.
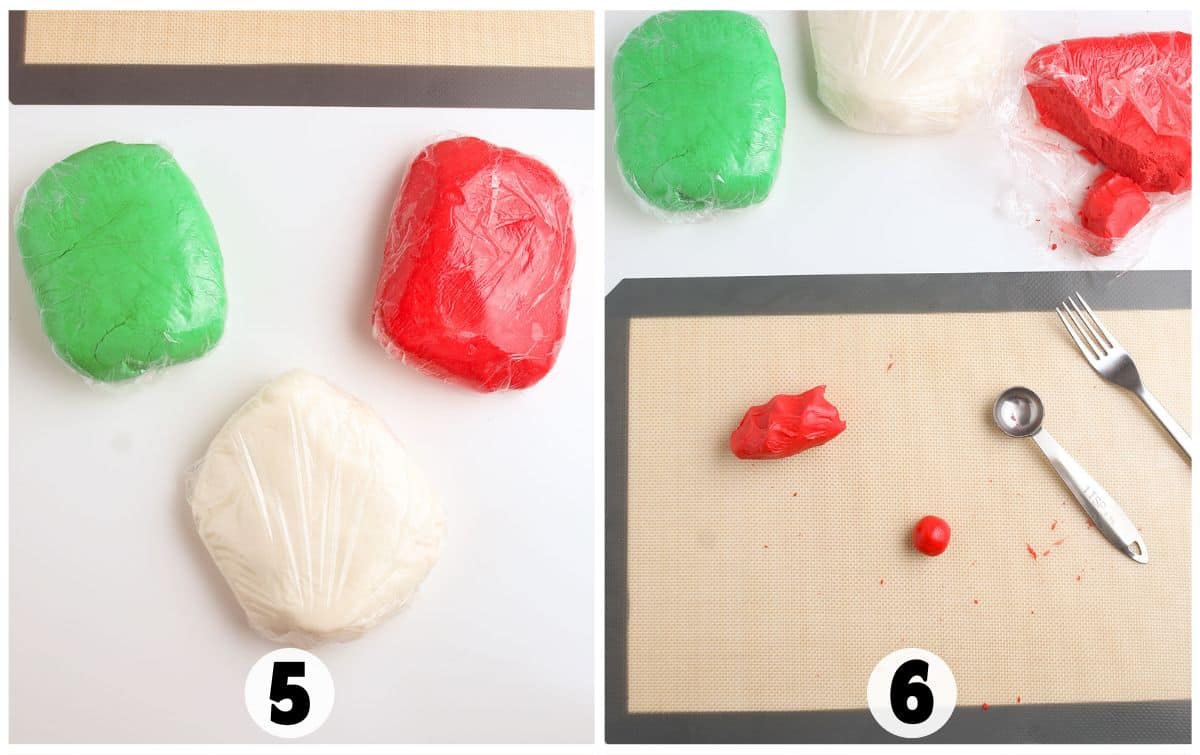
Step 5: Next, add food coloring to each portion and work the dough mixing in the color. Rewrap and then refrigerate again.
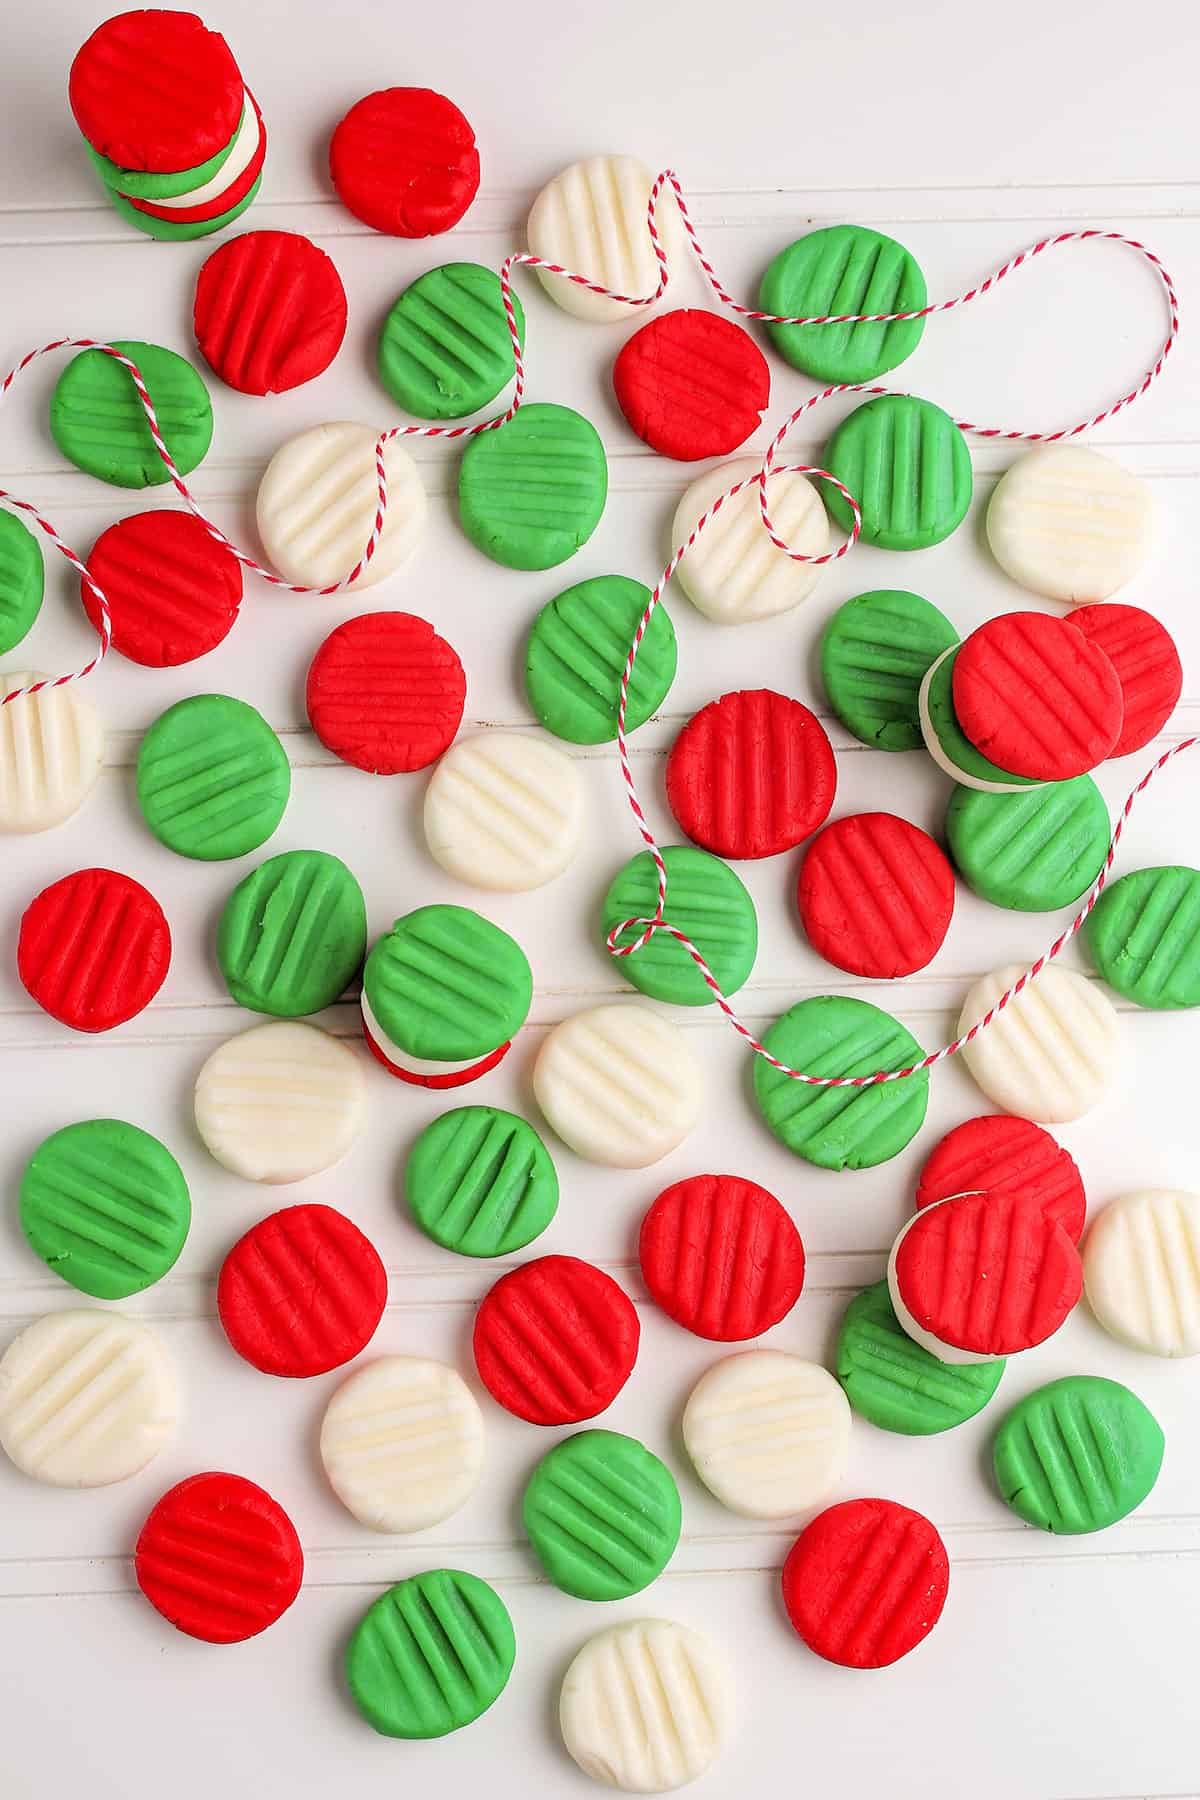
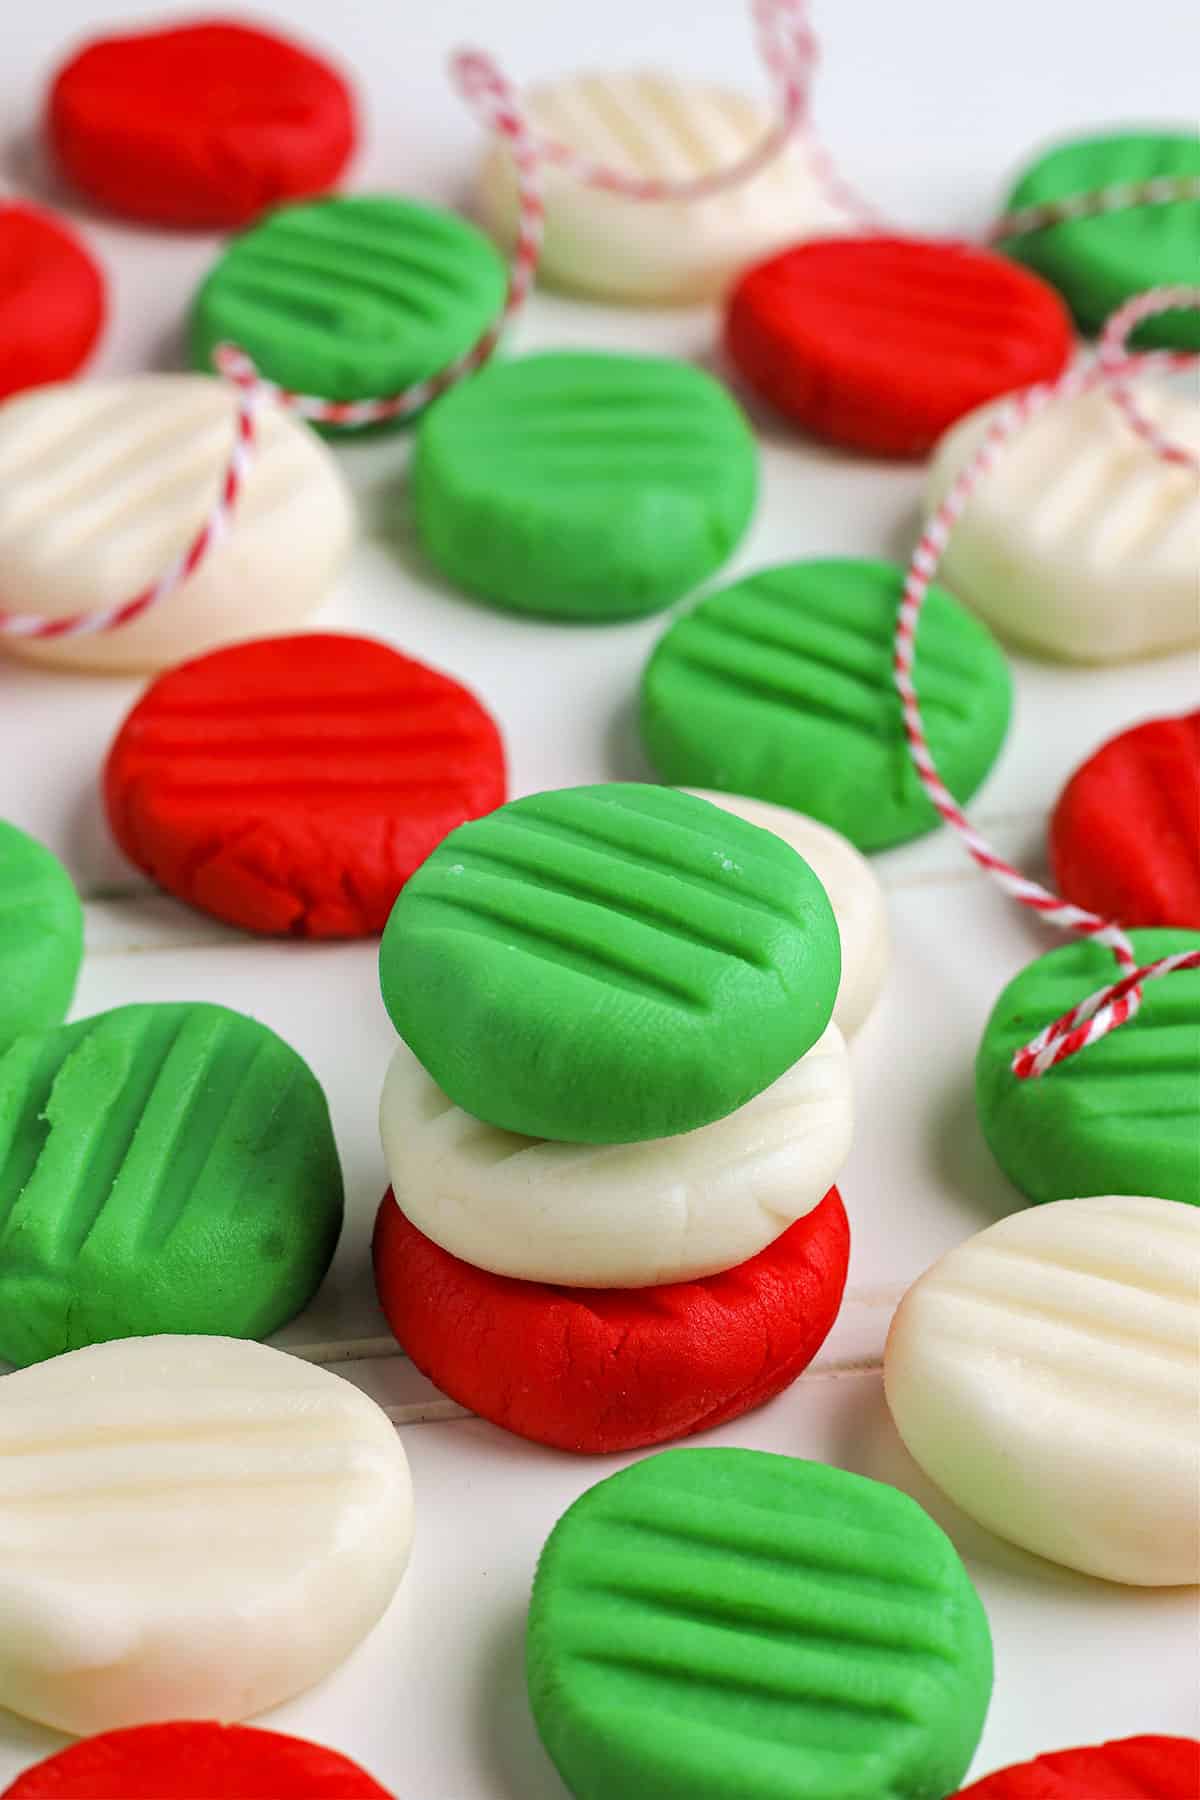
Step 6: Line the baking sheet with a silicone mat. Shape each mint, I did a measuring scoop for similar-sized mints.
Step 7: Place mints on the tray and allow them to dry for 12-24 hours. Once dried store in an airtight container.
Storing and Freezing
Once the mints are dried, you’ll want to store them in an airtight container at room temperature. You can also use a sealed storage bag if you would prefer. The mints will be stored at least 3 weeks.
You can also freeze the mints if you would prefer. Freeze for up to 3 months in a freezer-safe bag or container. Then thaw on the counter when you are ready to eat some of the mints.
Tips for Making Butter Mints
It is a must that the butter is at room temperature. Otherwise, the butter will not cream properly with the other ingredients.
If you find that the powdered sugar has clumps you can easily run the powdered sugar to a sifter to make it a smoother texture.
You can add less or more extract and flavoring to adjust the flavor of the butter mints.
If your mint texture needs to be a bit thicker then add more powdered sugar. If you find the mixture is too thick add a bit more half and half to thin up the texture.
Recipe FAQs
Butter mints are traditionally gluten-free. Just make sure that if you purchase the mints it was made in a gluten-free factor. Now, these mints are made with ingredients that are not gluten-free.
Yes, these mints do contain dairy products in the ingredients. If you want to make a dairy-free mint you can use alternatives for the ingredients.
You sure can! Just don’t make the shapes too big, as it will be harder for them to dry completely and will take longer. I know the more traditional way is to roll them in 1/2 inch thick ropes on a powdered sugar dusted surface and cut them into 1/4-inch to 1/2-inch pieces. You can also leave the mints in small balls too.
More Candy Recipes for Christmas
If you try this recipe, be sure to leave a rating below and also share it on Instagram, and tag me! You can also find me on Facebook and stay up to date on recipe releases by joining the Newsletter!
Butter Mints
SAVE THIS RECIPE
Ingredients
- ½ cup butter, room temperature
- 4 cups powdered sugar
- 1 tablespoon half-and-half or whole milk
- 1 teaspoon vanilla extract
- ½ teaspoon peppermint extract
- gel food coloring, optional
Instructions
- In a large bowl, add the ½ cup butter. Beat with a hand mixer on medium speed, beat until smooth and creamy.
- Gradually add in the 4 cups powdered sugar, beat on low until the powdered sugar is well incorporated into the butter. It won’t come together into a dough yet.
- Add in the 1 tablespoon half-and-half or whole milk, 1 teaspoon vanilla extract, and ½ teaspoon peppermint extract. Mix on low until most of mixture begins clumping, then turn the mixer to medium speed and beat until well combined.
- Divide the dough into 3 equal portions if you are coloring.
- Wrap each portion tightly in plastic wrap and chill for 30 minutes in the fridge.
- Remove one portion at a time and add 5 to 7 drops of gel food coloring and work it into the butter mint dough by kneading it until no white streaks are left. If you want a deeper color, add additional drops of gel food coloring and continue kneading it until you reach the desired color.
- Rewrap the portion of butter mint dough with plastic wrap and chill for at least 1 hour. Repeat with each portion.
- Line baking sheets with parchment paper or silicone mats.
- Using a 1 teaspoon measuring spoon or cookie scoop, scoop each butter mint and roll into a ball.
- Flatten each ball slightly with your thumb and then using a fork make a slight impression.
- Place each mint on the prepared baking sheet. They can be close together as they’re just drying.
- Allow the mints to dry at room temperature for 12 to 24 hours.
- Store in airtight container at room temperature.
Notes
Nutrition
(Nutrition facts are an estimate and not guaranteed to be accurate. Please see a registered dietitian for special diet advice.)