Rock Candy On a Stick
This post may contain affiliate links. As an Amazon Associate I earn from qualifying purchases. Please read my disclosure policy.
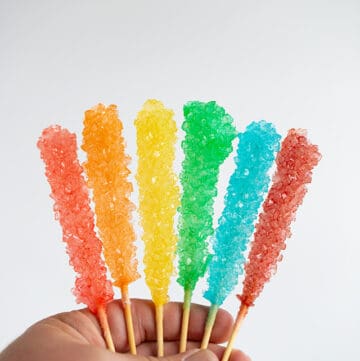
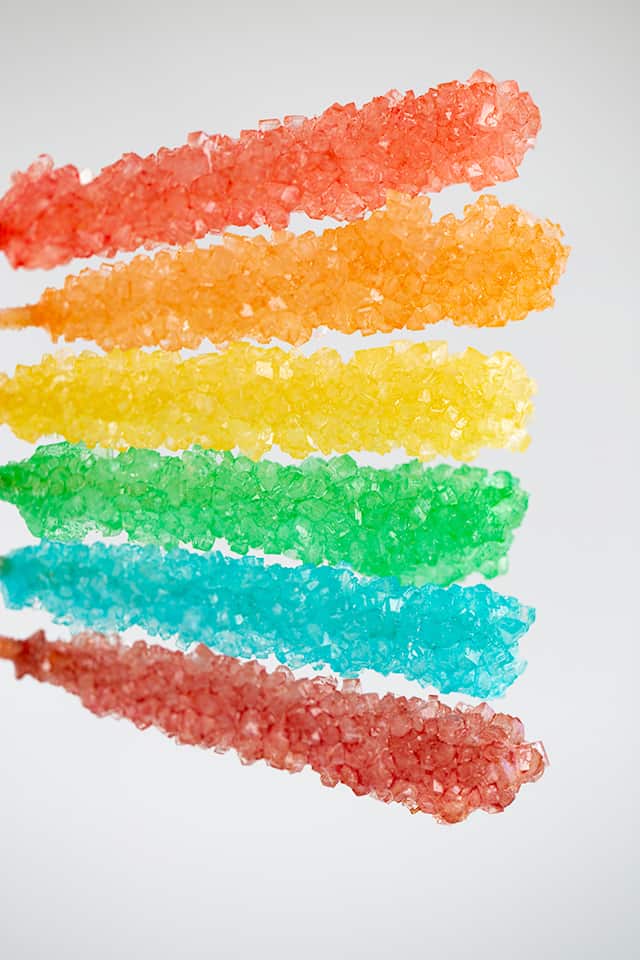
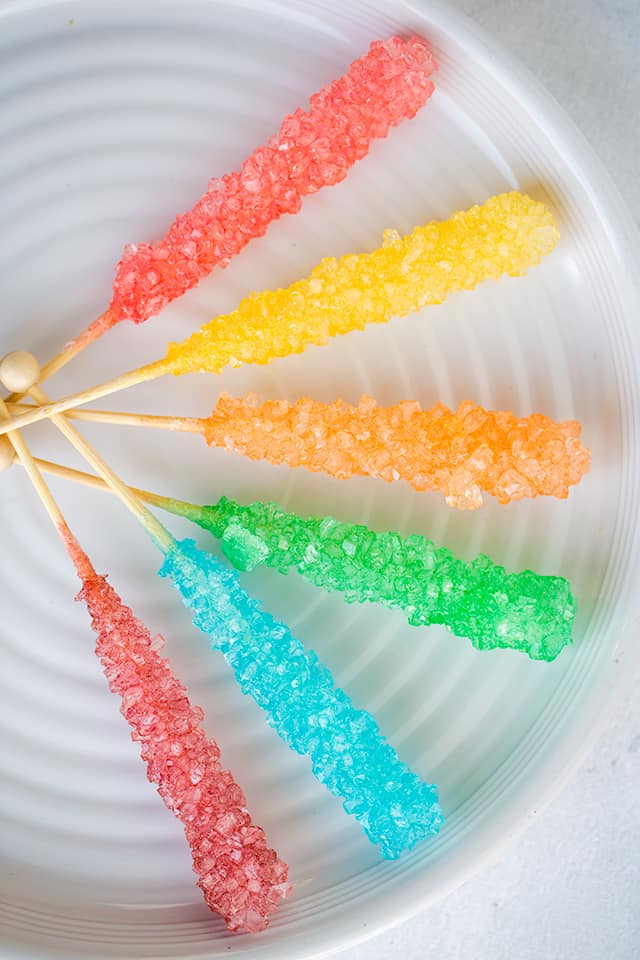
Rock Candy on a Stick is easy to make and a fun experiment for the kids! This Homemade Rock Candy will develop large sugar crystals over a 7 day period and will make the perfect sweet treat for your little helpers afterward.
Rock candy is one of those treats that really reminds me of my childhood. I remember thinking how cool the candy crystals looked and how excited I was to “eat rocks”. When I first made the candy, I was shocked at how cool of a process it was. It’s an edible science experiment! However, this science experiment is actually pretty easy to do and, when the result is a delicious sweet treat, you should definitely give it a try right away!
Rock candy Ingredients and Tools
You don’t need very many ingredients to make rock candy. In fact, you really only need three things:
- Sugar
- Water
- Flavoring
That’s it! Of course you may want to add some food coloring to your rock candy recipe in order to make perfectly colored candies but this is completely optional. You also can skip the flavoring oils and use only sugar and water to make your candies. You can’t go wrong with a simple, sweet, original rock candy!
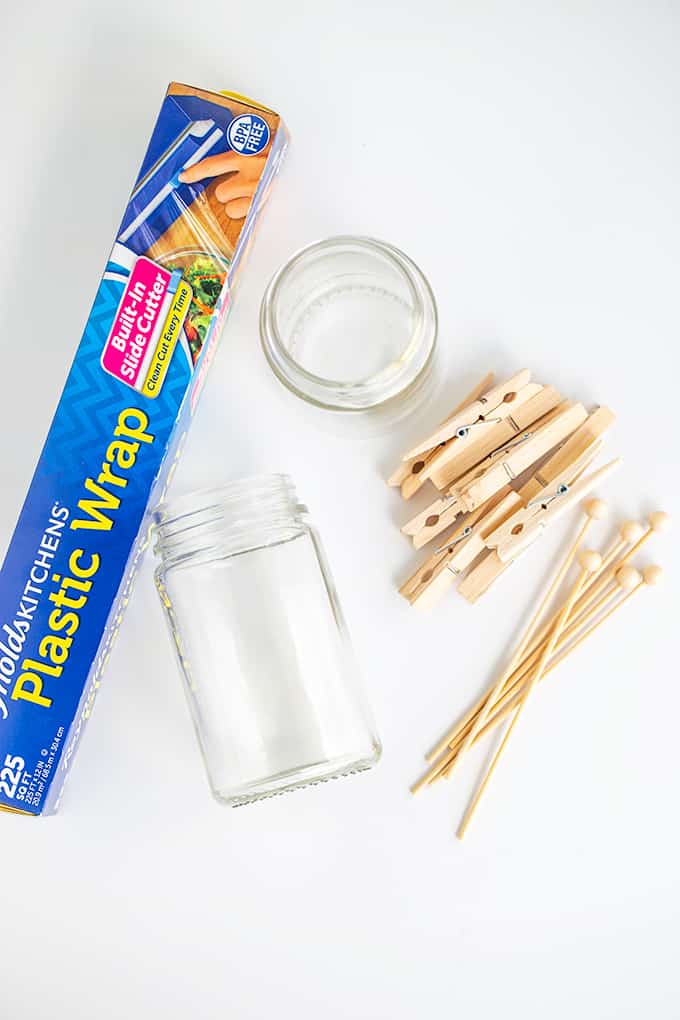
You will need a few special tools to make your rock candy experiment work perfectly. Many of these things you may already have in your kitchen. Here is what you need to make rock candy a home:
- Rock candy sticks (Wooden skewers or lollipop sticks work as well)
- Pint sized mason jars
- Clothes pins
- Plastic wrap
With these four household items, you can easily make rock candy right in your own kitchen. You will be able to use the same mason jars and clothes pins again and again, making as much rock candy as you’d like! You will need new skewers or lollipop sticks with each batch you make and plastic wrap can be hard to recycle, you may want new plastic wrap squares too. Once you have everything on this list, you are ready to start making candy!
How to Make Rock Candy on a Stick
The first step in making rock candy on a stick is to make the sugar solution. You want to be sure to measure the sugar and water perfectly as the perfect ratio is necessary in making the candy successfully. The water needs to be fully saturated with the sugar, dissolving as much sugar into the water as possible. The super saccharine syrup is then brought to a simmer and set aside to cool.
If you want to add a flavor to your rock candy, you can add a few drops of oil candy flavoring to the syrup after it has simmered. Candy flavors can be very strong so be sure to only add a few drops! Stir the flavoring in and then let the rock candy syrup cool. That is all you need to do to make the rock candy solution!
How to Grow Rock Candy
Once you have your perfect rock candy solution, you are ready to start letting it crystalize and grow. The first step in growing rock candy is to coat your wooden skewer or lollipop stick in sugar. Coat the sticks completely as the rock candy will only grow where there is sugar on the stick.
Set the sugar coated sticks aside to dry. Letting the sticks dry well will ensure that the rock candy sticks to the stick. If the sugar doesn’t dry enough, the rock candy will slide right off or not even form on the stick. Take the time to dry the sugar well! You’ll be happy you did when you have perfect rock candy on a stick!
Once your sugar coated sticks have dried, place two clothespins on the end of the stick to hold it. The clothespins should look like the top of the letter “t” and the stick should be the long, vertical part of the “t”.
Divide the rock candy solution between the mason jars and then dip the stick into the solution, keeping the stick away from the edges of the jar. You also do not want the stick to touch the bottom of the jar. The clothespins should be resting on the top of the mason jar with the stick hanging down the middle of the jar.
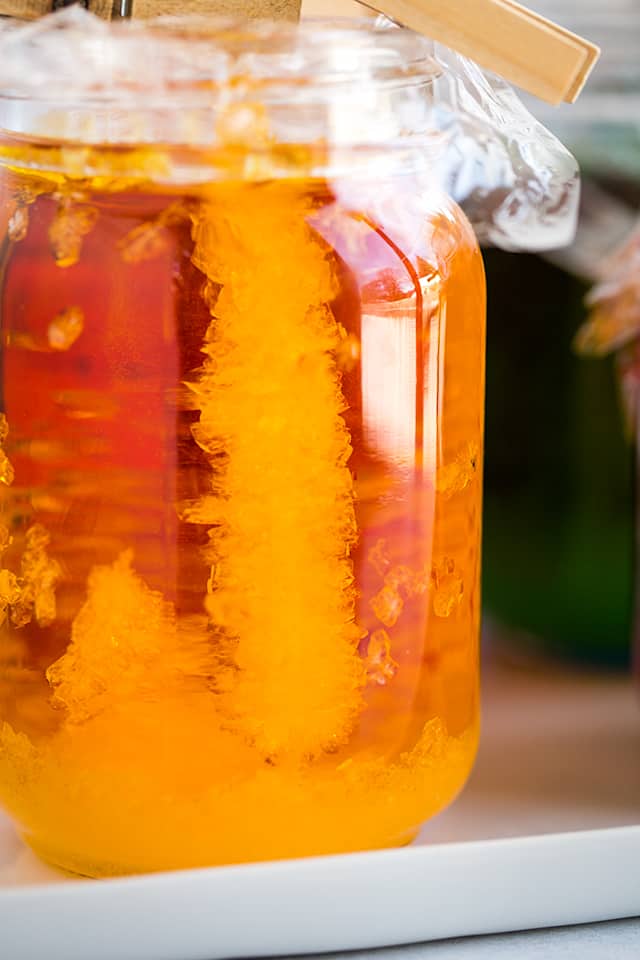
Cut a small piece of plastic wrap and cover the jar completely. Then, all you need to do is wait! Sugar crystals will start to form in just a few days! Once the crystals are the size you’d like, remove the sticks from the solution and set them aside to dry. They are now ready to enjoy!
How Long Can I Store Rock Candy?
Rock candy can be stored for quite a long time. Since sugar is an excellent preservative, you can keep rock candy for up to a year. Just be sure to wrap the rock candy well and prevent it from hot or humid weather. Humidity or moisture in the air will melt the sugar crystals, causing them to dissolve. Store the rock candy in an airtight container and enjoy whenever the craving for this nostalgic candy hits!
Rock Candy Troubleshooting Tips
Sugar will not stick to the stick if the sticks were not set aside to dry. When you dip the sticks in water and then into the extra granulated sugar, you really want to make sure that granulated sugar has time to dry and stick to the stick. This will give the new rock candy sugar crystals something to grab on to. If the sticks are not dried well, the extra granulated sugar will simply wash off when placed in the rock candy collusion. Then, the rock candy crystals will not have anything to stick to and they will just slide off. Drying the sticks is essential to making rock candy lollipops.
Rock candy growing at the bottom of the jar rather than on the stick is a common occurrence. This happens when your stick is too close to the bottom of the jar. It is easier for the sugar crystals to form on the bottom of the jar rather than vertically on the stick. So, when the sugar-dipped stick is near the bottom, the crystals will start to build downward, going toward the easy base rather than climb up the stick. To prevent this from happening, make sure you keep the stick at least an inch from the bottom of the mason jar. This is essential to making perfect, DIY rock candy!
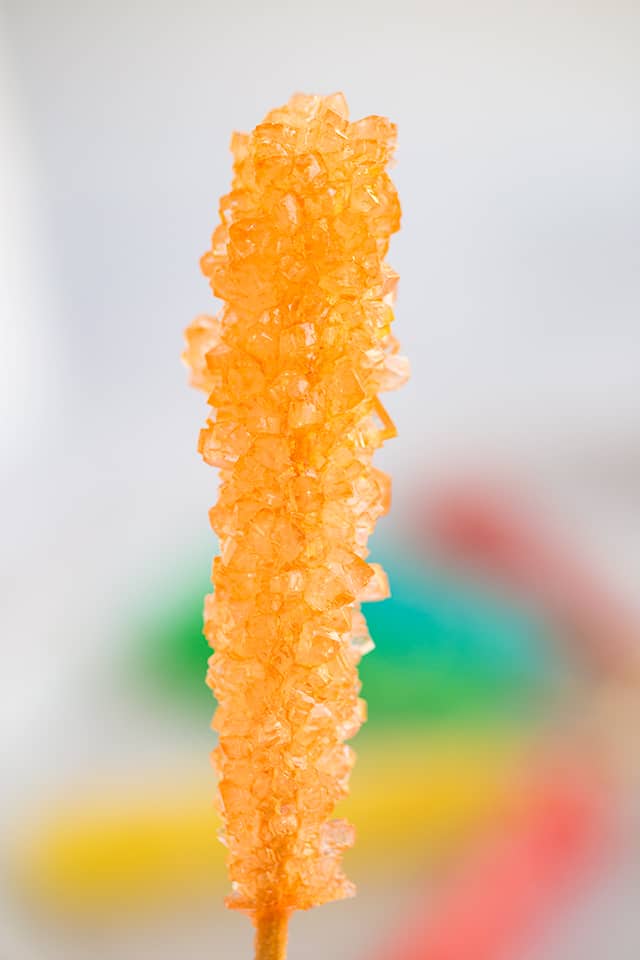
Rock candy crystals may be small if the sugar solution is not supersaturated with sugar. You want to make sure that the water is completely packed with sugar when you simmer the two ingredients together. Keep adding sugar until it no longer dissolves in the hot water. You will be surprised how much sugar you can pack into the water! Get as much sugar in as possible to ensure large sugar crystals.
It only takes about 5-7 days to grow rock candy on a stick. You may even see rock candy crystals form after a few hours! The longer you let the rock candy stick sit in the solution, the larger your rock candy lollipops will be!
Both options will work perfectly. Popsicle sticks tend to be flat and wide which will make the crystals grow in different shapes, however, they will still grow! Rock candy crystals will form on a string as well but they tend to be smaller in size. Don’t worry though, you will get rock candy with a stick, a string, or a popsicle stick!
If you do not have a mason jar on hand, a plastic cup will work in its place. We like using mason jars as you can see clearly through the jar, enabling you to watch the whole process of DIY rock candy. It is fun to see those crystals form! However, a plastic cup will still work to make your delicious candy.
After you make rock candy, you can clean your mason jars with simple soap and hot water. Sugar dissolves almost immediately in hot water so any excess candy crystals will be easy to wash off. You can also pop the jars into the dishwasher to make the clean-up even faster.
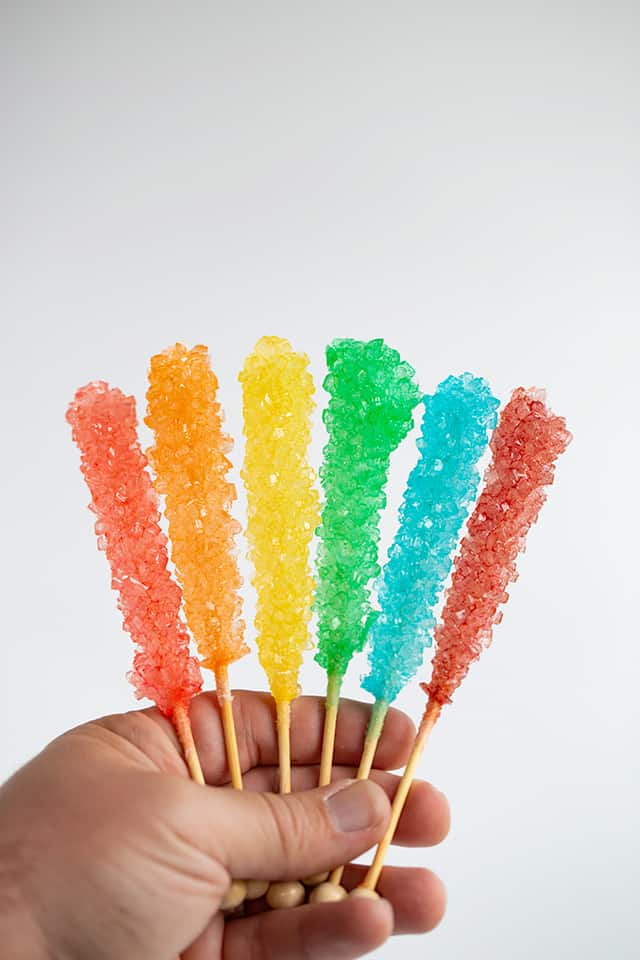
Let us know how much you loved making these rock candy lollipops. Did they remind you of your childhood too? I know that one lick of these tasty candies and I felt like I was a kid again! We hope you enjoy them!
If you try this recipe, be sure to leave a rating below and also share it on Instagram, and tag me! You can also find me on Facebook and stay up to date on recipe releases by joining the Newsletter!
Rock Candy on a Stick
SAVE THIS RECIPE
Ingredients
- 6 cups granulated sugar, divided
- 2 cups water
- candy flavoring, I recommend LorAnn Oils, optional
- 1/3 cup additional granulated sugar, for coating sticks
- 6 wooden sticks, skewers, or lollipop sticks
- 6 pint mason jars, double the syrup recipe for 6 quart jars
- food color, optional
- 12 clothes pins
- plastic wrap
Instructions
- In a large saucepan, add in 2 cups granulated sugar and 2 cups water. Heat on medium heat until the sugar is dissolved.
- Slowly add more sugar into the saucepan until it no longer dissolves, this should be the remaining 4 cups granulated sugar.
- If you’re adding candy flavoring, add it in now and let the syrup come up to a simmer.
- As soon as the syrup begins to simmer, remove from the heat and let cool.
- Add about 1/3 cup additional granulated sugar to a plate or a flat surface that the sticks can easily roll in.
- Dip the 6 wooden sticks or skewers in water and roll in the additional sugar. Make sure the sticks are covered well with sugar.
- Set the sticks aside to dry completely.
- Using a funnel, pour the syrup into the 6 pint mason jars. Fill it up to where the ridges begin at the neck of the mason jar. This will leave about an inch of space from the top of the jar and the syrup.
- Add in a good amount of food color to the jar to color the sugar crystals. Stir to combine.
- Using 12 clothes pins, place one on either side of the dry wooden stick and lower the stick in the jar, leaving about an inch from the bottom of the mason jar. The wooden sticks will hold the stick in place.
- Cut squares of plastic wrap that will cover the tops of the mason jars. Cut a small hole in the center of the square.
- Gently place the plastic wrap on the mason jar, making sure the hole in the center of the plastic wrap is centered on the stick so the stick doesn’t move.
- Let the jars sit for 5 to 7 days until you like the size of the crystals on the sticks. You’ll be able to watch the crystals grow
- Remove the sticks of the mason jars and allow them to hang upside down in a clean jar or cup until the syrup is done dripping off from the sticks and they’ve dried, about 4 to 6 hours.
Notes
Nutrition
(Nutrition facts are an estimate and not guaranteed to be accurate. Please see a registered dietitian for special diet advice.)
Can I put two skewers in one pint size mason jar?