Mini Cheesecakes
This post may contain affiliate links. As an Amazon Associate I earn from qualifying purchases. Please read my disclosure policy.

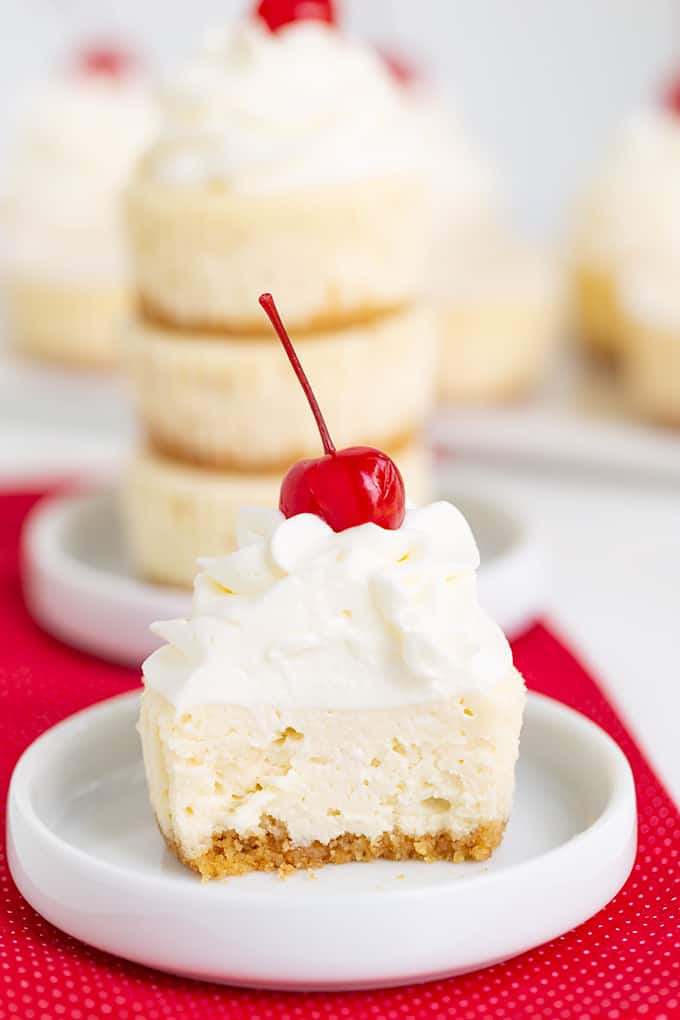
These easy Mini Cheesecakes are made with homemade graham cracker crusts and filled with a creamy, slightly dense cheesecake filling. It’s the perfect single serving dessert to serve at gatherings, parties, or just for fun.
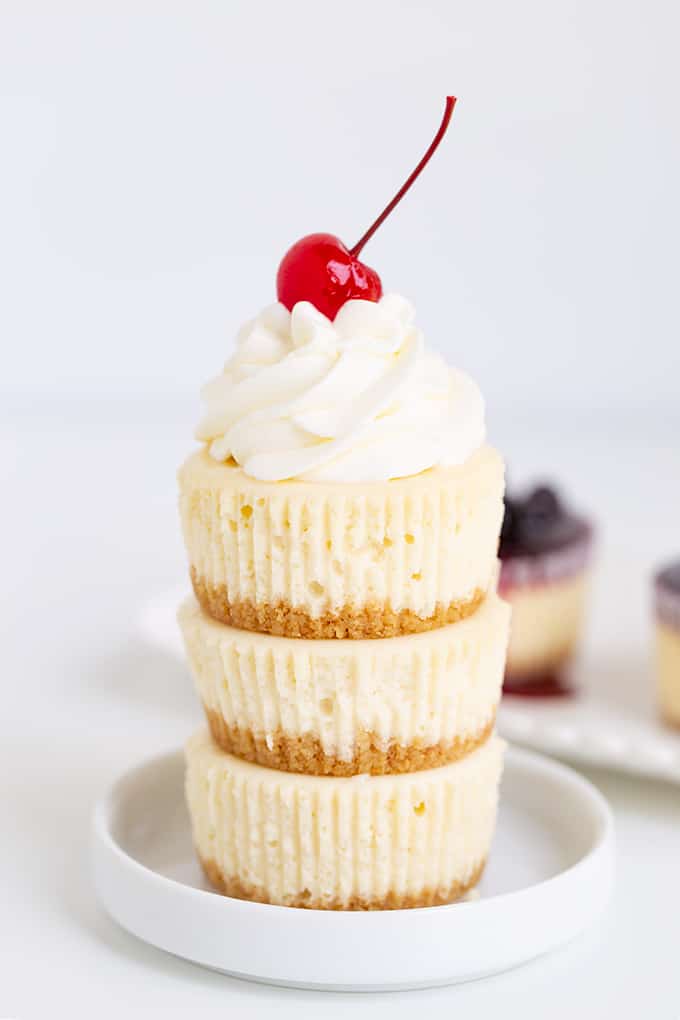
When you want the perfect dessert in a bite for your next party or special evening, our lovely mini cheesecakes will delight everyone.
Traditional cheesecake is prepared in individually-sized pans and sweetly topped with whipped cream and a cherry.
Ingredients for Mini Cheesecakes
Graham Cracker Crumbs – You can buy pre-made or make your own!
Granulated Sugar – Regular white sugar.
Butter – Real butter is preferred. Salted or unsalted will both work.
Cream Cheese – Don’t forget to set it out a couple of hours ahead of time.
All-Purpose Flour – This is used for thickening the cheesecake recipe slightly.
Sour Cream – Adds just the right hint of sour in this classic cheesecake.
Vanilla Extract – Unless you must for personal reasons, avoid imitation vanilla. Homemade vanilla extract is also a great option.
Eggs – Large eggs are preferred for this recipe.
How to Make Mini Cheesecake Bites
Making the Crust
These mini cheesecakes are made in a cupcake pan, so the first step is to put cupcake liners in each spot and preheat your oven to 350ºF. With the pan prepared, you can begin mixing the crust.
Melt the butter. Mix the graham crackers and sugar together and then pour the melted butter over this mixture. Divide this crust mixture evenly between all of the cupcake liners.
Press the crust down evenly using the bottom of a cup or your fingers. Set this aside in the refrigerator to help it set up while you mix up the cheesecake filling.
Making the Cheesecake Filling
Beat your cream cheese until it is nice and fluffy first and then begin adding the other ingredients. First, add in the sugar and flour. Get that all incorporated and make sure to scrape down the sides of the bowl. Then add and incorporate the sour cream and vanilla.
Eggs should be added one at a time scraping the sides of the bowl between each egg.
Making the Mini Cheesecakes
Fill each cupcake liner by evenly dividing the cheesecake filling between each one. Feel free to fill them almost all the way to the top since this recipe doesn’t expand.
Place the cupcake pan in the preheated oven for 18 to 22 minutes until the cheesecakes are set. Then, turn the oven off and let the cheesecakes cool with the oven door ajar for 20 to 30 minutes.
Remove your mini cheesecakes from the oven and let them cool completely to room temperature before placing in the fridge to chill for at least 3 hours or overnight.
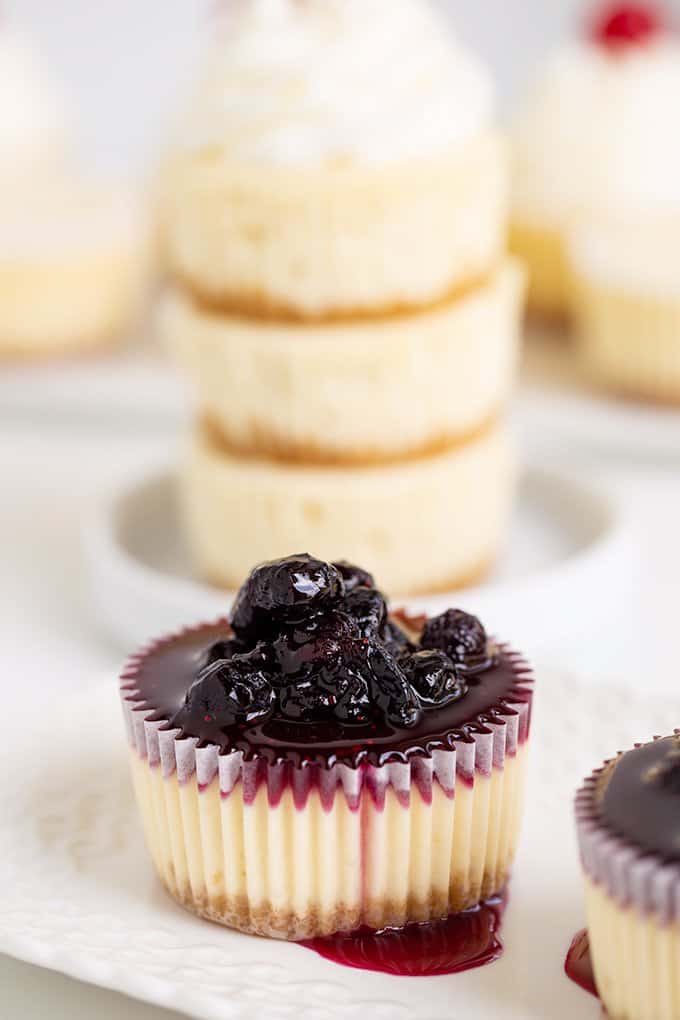
To serve your cheesecakes, unwrap them from the cheesecake liners and add toppings such as pie filling, whipped cream, or fresh berries.
Tips for Best Results
I always chill my cheesecakes overnight. More time chilling improves the flavor significantly!
Once each spot in the cupcake pan is filled, tap the pan on the counter a few times to settle the cheesecake and remove any air pockets.
Recipe FAQs
Can I Make Mini Cheesecakes Gluten-Free?
Yes. To make our mini cheesecake recipe safe for your gluten-free or celiac friends you will need to make two significant changes. First, use a gluten-free graham cracker or a different hard gluten-free cookie to make the crust. You will have to crush them on your own unless you are lucky enough to live in a big city where gluten-free graham cracker crumbs are sold. Second, you will need to use a gluten-free all-purpose flour substitute for the thickening agent in the cheesecake filling.
What else can I put on top of the mini cheesecakes?
You can top a mini cheesecake with just about anything! Pie filling works great, as does macerated fruit such as strawberries soaked in sugar. Shaved chocolate would be lovely too! Crushed candy bars work, and you could also use a jar of lemon curd or fruit preserve.
Can I make mini cheesecakes ahead of time?
Yes! You can make the cheesecake bites several days ahead of time and refrigerate them. I recommend waiting to add a topping until you are ready to serve them.
Can I freeze mini cheesecakes?
Yes! These cheesecakes can be frozen without a topping and thawed later when you have the craving or need to serve last-minute guests a lovely dessert. Use an airtight container to serve the mini cheesecakes.
How do I store leftovers?
Mini Cheesecakes should be kept in the refrigerator in an airtight container and will last for several days. You could also choose to freeze them where they will last for several months.

More Lovely Single-Serve Desserts
- Easy No-Bake Butterfinger Bites
- Buckeye Brownie Bites
- Candy Cane Cheesecake Bites
- Peanut Butter Cookie Cups with Chocolate Filling
Mini Cheesecakes
SAVE THIS RECIPE
Ingredients
Crust
- 3/4 cup graham cracker crumbs
- 1 1/2 tablespoons granulated sugar
- 1/4 cup butter, melted
Cheesecake
- 16 ounces cream cheese, room temperature
- 2 tablespoons all-purpose flour
- 3/4 cup granulated sugar
- 1 cup sour cream
- 2 teaspoons vanilla extract
- 2 large eggs
Instructions
Crust
- Preheat the oven to 325 degrees F. Line a cupcake pan with paper liners and set aside.
- In a medium bowl, add in the graham cracker crumbs and sugar. Stir until combined.
- Add in the melted butter and stir until the butter has coated the crumbs.
- Divide the crumbs evenly into the liner cups. Firmly and evenly press the crumbs into the bottom of the liners, using a flat bottomed cup or fingers to do so.
- Place the cupcake pan in the fridge to help the crusts set up.
Cheesecake
- In a large mixing bowl, add in the cream cheese. Beat with a hand mixer on medium until smooth. Scrape down the sides of the bowl.
- Add in the granulated sugar and flour. Beat until combined. Scrape down the sides of the bowl.
- Add in the sour cream and vanilla extract. Continue to mix until the sour cream is incorporated.
- Add in the eggs one at a time and beat just until the egg is combined. Scrape down the bowl after each egg is blended before adding the next egg.
- Divide the batter into the 12 cupcake liners. You can fill them almost to the top as they won’t pour out of the liners during baking. Give the mini cheesecakes a few taps on the counter to help remove any air bubbles.
- Place in the preheated oven for 18 to 22 minutes until the cheesecakes are set.
- Turn the oven off and let the cheesecakes cool with the oven door ajar for 20 to 30 minutes.
- Remove from the oven and let cool completely to room temperature before placing in the fridge to chill at least 3 hours to overnight. I always chill my cheesecakes overnight.
- Unwrap the cheesecakes and serve. Add toppings such as pie filling, whipped cream, or fresh berries.
(Nutrition facts are an estimate and not guaranteed to be accurate. Please see a registered dietitian for special diet advice.)
These are too cute! I adore anything “mini”. Plus the cherries on top add such a nice pop of colour 😍
what do you wrap the cheesecakes in when putting them in the refrigerator?
I loosely cover them in plastic wrap. I also have a plastic cake storage box (you can find them on amazon) that works well. The top is nice and high and it is also airtight!
Looks delicious. All your recipes are fabulous.